DIY Plumbing Fixes Every Raleigh Homeowner Should Know
Nobody wants to wake up to a dripping faucet or discover their toilet won’t stop running at 2 AM. While plumbing problems always seem to happen at the worst possible moments, many common issues can be fixed with basic tools and a little know-how.
Learning a few essential DIY plumbing skills saves you time, money, and the frustration of waiting for emergency repairs. This guide covers the most common plumbing problems Raleigh homeowners face and provides step-by-step solutions you can tackle yourself. We’ll also help you recognize when it’s time to call the professionals.
From leaky faucets to stubborn clogs, these practical plumbing repair tips will help you handle minor issues before they become major headaches.
Essential Tools for DIY Plumbing
Before diving into repairs, gather these basic tools that will handle most common plumbing fixes:
- Plunger (cup plunger for sinks, flange plunger for toilets)
- Adjustable wrench (10-12 inch works for most jobs)
- Pipe wrench (for gripping round pipes)
- Screwdrivers (both flathead and Phillips)
- Plumber’s tape (Teflon tape for sealing threads)
- Drain snake or auger (for clearing tough clogs)
- Rubber gloves (protect your hands from germs and chemicals)
- Flashlight or headlamp (for working in dark spaces)
Keep these items in a designated toolbox so they’re ready when you need them. Having the right tools makes repairs faster and reduces the risk of causing additional damage.
How to Fix a Leaky Faucet
A dripping faucet wastes water and money while creating that annoying sound that keeps you awake at night. The repair method depends on your faucet type, but most leaks stem from worn washers, O-rings, or cartridges.
Compression Faucets
These older faucets have separate hot and cold handles that turn multiple times to shut off completely.
Steps to repair:
- Turn off the water supply valves under the sink
- Remove the handle by unscrewing the packing nut
- Unscrew the packing nut and remove the stem
- Replace the rubber washer at the bottom of the stem
- Replace the O-ring around the stem if it’s worn
- Reassemble in reverse order
The most common cause of drips is a worn washer that no longer creates a tight seal. Replace both the washer and O-ring even if only one appears damaged—they typically wear at similar rates.
Ball, Cartridge, and Ceramic Disc Faucets
Modern single-handle faucets use different mechanisms but follow similar repair principles.
For cartridge faucets:
- Turn off water supply and remove the handle
- Remove the retaining clip or nut holding the cartridge
- Pull out the old cartridge (note its position)
- Install the new cartridge in the same orientation
- Replace O-rings and reassemble
Pro tip: Take photos before disassembly to remember the correct order and orientation of parts. This saves time and prevents mistakes during reassembly.
Unclogging Drains Without Harsh Chemicals
Clogged drains rank among the most common plumbing problems in Raleigh homes. Hair, soap scum, food particles, and grease build up over time, creating blockages that slow drainage or cause complete backups.
Kitchen Sink Clogs
Kitchen drains typically clog from grease, food scraps, and soap residue.
Natural cleaning method:
- Remove standing water with a cup or bowl
- Pour one cup of baking soda down the drain
- Follow with one cup of white vinegar
- Cover the drain with a plug or cloth for 15 minutes
- Flush with hot water
This combination creates a fizzing action that breaks down organic matter and helps flush away debris. Repeat the process if the drain still runs slowly.
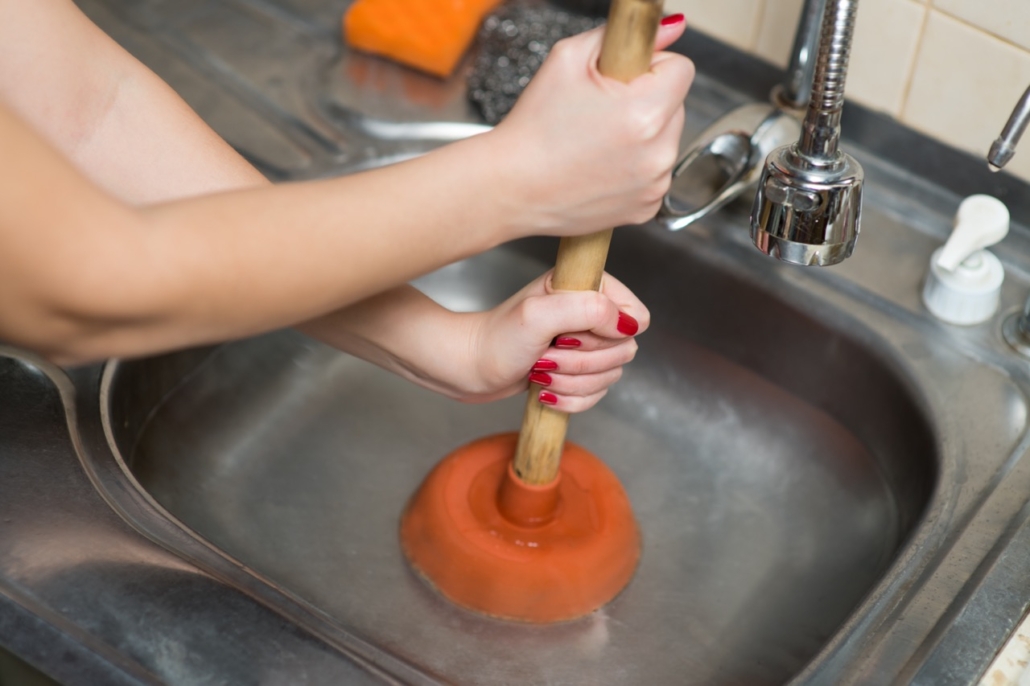
For stubborn clogs:
- Try plunging with a cup plunger
- Use a drain snake to break up the blockage
- Remove the P-trap under the sink to clear debris manually
Bathroom Sink and Tub Drains
Hair and soap scum create most bathroom drain clogs. Many blockages occur near the surface where you can reach them easily.
Steps for hair clogs:
- Remove the drain stopper or strainer
- Use needle-nose pliers or a wire coat hanger to pull out hair
- Clean the stopper thoroughly before reinstalling
- Run hot water to clear remaining debris
For deeper clogs:
- Use a plastic drain snake designed for hair removal
- Try the baking soda and vinegar method described above
- Consider enzyme-based drain cleaners that break down organic matter safely
Preventive Maintenance
Prevention beats repair every time. These simple habits keep drains flowing freely:
- Install drain screens to catch hair and debris
- Never pour grease down kitchen drains
- Run hot water after each use to clear soap residue
- Clean drain stoppers weekly
- Use the baking soda and vinegar treatment monthly as maintenance
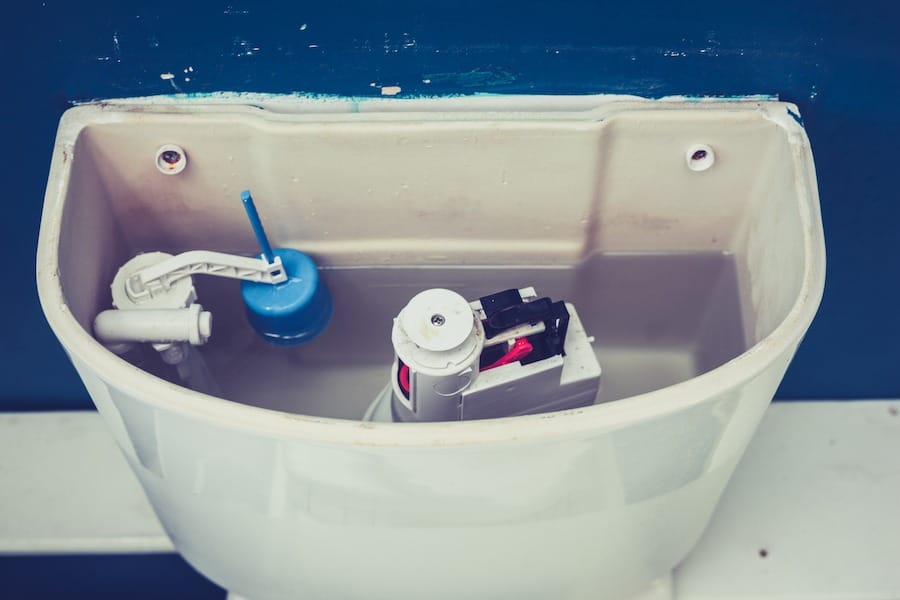
Stopping a Running Toilet
A toilet that won’t stop running wastes hundreds of gallons of water monthly and drives up your utility bills. Most running toilet problems involve the flapper, chain, or fill valve—all parts you can fix yourself.
Diagnosing the Problem
Remove the toilet tank lid and look inside to identify the cause:
- Flapper not sealing: The rubber flapper should sit flat against the valve seat
- Chain too long or short: The chain should have slight slack when the flapper is closed
- Water level too high: Water should sit about 1 inch below the rim of the overflow tube
- Fill valve not shutting off: The fill valve should stop when the water reaches the correct level
Common Fixes
Adjusting the flapper:
- Turn off water at the shutoff valve
- Flush to empty the tank
- Clean the flapper and valve seat of mineral deposits
- Adjust or replace a warped flapper
- Ensure the flapper chain has proper tension
Replacing the flapper:
- Disconnect the chain from the flush lever
- Remove the old flapper from the posts
- Install the new flapper, ensuring it sits flush
- Reconnect the chain with slight slack
- Test the flush to ensure proper operation
Adjusting water level:
- Bend the float arm down to lower water level
- Adjust the screw on newer fill valves
- Replace the fill valve if it won’t shut off
Most hardware stores carry universal toilet repair kits that include flappers, chains, and fill valves for under $20.
Fixing Low Water Pressure
Low water pressure frustrates homeowners and makes daily tasks take longer. While some causes require professional attention, you can address several common issues yourself.
Cleaning Aerators and Showerheads
Mineral deposits from hard water commonly clog aerators and showerheads, reducing water flow.
For faucet aerators:
- Unscrew the aerator from the faucet tip
- Disassemble the parts and soak in white vinegar overnight
- Use an old toothbrush to scrub away deposits
- Reassemble and reinstall
For showerheads:
- Remove the showerhead by turning counterclockwise
- Soak in vinegar solution overnight
- Use a small brush to clean spray holes
- Rinse thoroughly and reinstall
If you can’t remove the showerhead easily, fill a plastic bag with vinegar, secure it around the showerhead with a rubber band, and let it soak overnight.
Checking Supply Valves
Partially closed water supply valves can reduce pressure throughout your home.
Steps to check:
- Locate the main water shutoff valve (usually near the street)
- Ensure it’s fully open by turning counterclockwise
- Check individual fixture shutoff valves under sinks
- Open any valves that aren’t fully turned on
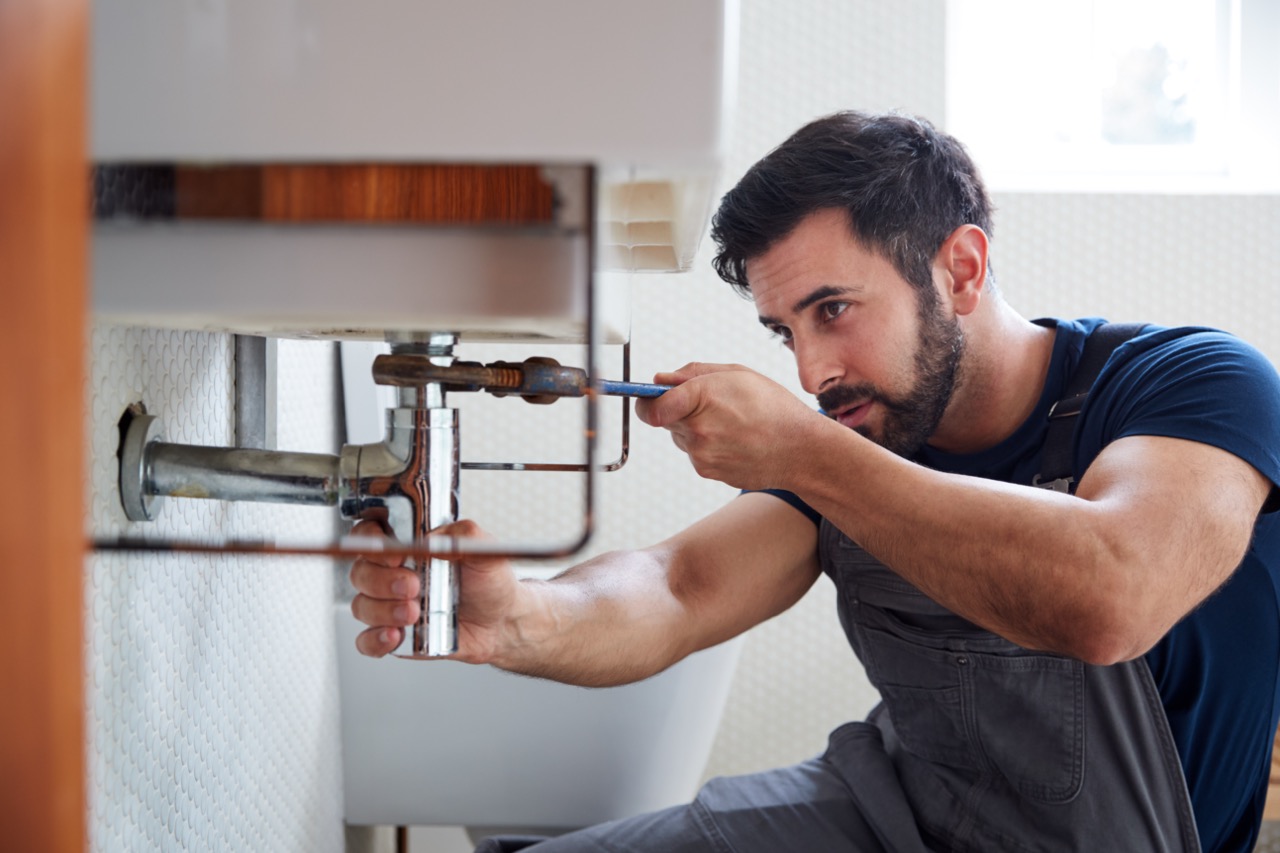
Handling Minor Leaks Under Sinks
Small leaks under sinks often develop at connections and joints. Catching these early prevents water damage and mold growth.
Common Leak Locations
- P-trap connections: The curved pipe under the sink
- Supply line connections: Where water lines connect to shutoff valves
- Garbage disposal connections: If your sink has a disposal unit
Temporary Fixes
Loose connections:
- Turn off water supply
- Dry the area completely
- Tighten connections with an adjustable wrench
- Turn water back on and check for leaks
For threaded connections:
- Turn off water and drain the area
- Remove the connection
- Wrap threads with plumber’s tape
- Reconnect and test
Emergency patches:
- Use plumber’s putty for very small leaks
- Apply pipe repair tape as a temporary measure
- Keep pipe repair clamps on hand for larger leaks
Remember that these are temporary solutions. Plan to make permanent repairs or call a professional for persistent leaks.

When to Call the Professionals
DIY plumbing Raleigh homeowners can handle many common issues, but some problems require professional expertise and specialized tools.
Call a plumber for:
- Gas line issues: Never attempt gas line repairs yourself
- Main sewer line problems: These require specialized equipment
- Water heater repairs: Complex systems with safety considerations
- Pipe replacement: Requires knowledge of local codes
- Recurring problems: Issues that return after DIY fixes
- Water damage: When leaks have caused structural damage
Signs of serious problems:
- Multiple fixtures backing up simultaneously
- Sewage smells from drains
- Water pressure problems affecting the whole house
- Discolored water from multiple taps
- Unusual noises in walls or pipes
Raleigh-Specific Plumbing Considerations
North Carolina’s climate and soil conditions create unique challenges for plumbing systems.
Clay Soil Effects
Raleigh’s heavy clay soil expands and contracts with moisture changes, which can stress underground pipes and foundation connections.
Watch for:
- Soft spots in your yard indicating possible leaks
- Unusual settling around your home’s foundation
- Recurring drain problems that might signal pipe damage
Seasonal Considerations
- Winter: Protect outdoor faucets from freezing
- Spring: Check for winter damage after cold snaps
- Summer: Monitor water usage during drought conditions
- Fall: Clean gutters to prevent water damage to plumbing
Money-Saving Tips for DIY Plumbing
Smart shopping and proper maintenance save money on plumbing repairs.
Cost-Effective Strategies
- Buy quality parts: Cheap components often fail quickly
- Shop at plumbing supply stores: Better selection and expert advice
- Keep common parts on hand: Faucet washers, toilet flappers, pipe tape
- Learn gradually: Master one repair type at a time
- Document your work: Take photos and keep repair records
Preventive Maintenance Schedule
- Monthly: Clean drain stoppers, check for leaks
- Quarterly: Test toilet components, clean aerators
- Annually: Inspect supply lines, drain and flush water heater
- As needed: Address small problems immediately
Building Your DIY Plumbing Skills
Start with simple repairs and gradually build confidence and expertise.
Beginner Projects
- Replacing toilet flappers
- Cleaning aerators and showerheads
- Basic drain clearing
- Adjusting water levels
Intermediate Projects
- Replacing faucet cartridges
- Installing new toilet seats
- Replacing supply lines
- Simple pipe repairs
Resources for Learning
- Online video tutorials specific to your fixture brands
- Local hardware store workshops
- Plumbing repair manuals
- Community college courses
Conclusion
Learning basic DIY plumbing skills empowers Raleigh homeowners to handle common problems quickly and affordably. These plumbing repair tips help you address issues like leaky faucets, clogged drains, and running toilets without waiting for professional help.
Remember that while many repairs suit DIY completion, some problems require professional expertise. Don’t hesitate to call experienced plumbers for complex issues, gas line work, or situations involving potential water damage.
Regular maintenance prevents many plumbing problems from developing. Clean drains monthly, check for leaks regularly, and address small issues before they become expensive emergencies.
When DIY solutions aren’t enough, trust the experienced professionals at Poole’s Plumbing. Our licensed technicians handle everything from simple repairs to complete system installations, ensuring your Raleigh home’s plumbing operates safely and efficiently.
Contact Poole’s Plumbing today for expert assistance with complex plumbing issues, annual maintenance, or when you need reliable repairs you can count on.


