Draining a Water Heater
It seems like an easy enough task. Draining a Water Heater. However, being the number one name in Raleigh water heater experts, Poole’s Plumbing would like to help make sure that the process is a safe and easy one for you. Thus, in this article, we will walk you through the entire process, which depending on what type of unit you have, is suggested to be drained every 6-12 months.
You will be opening the valve up before draining the heater and always be sure to check it as your last step.
Why and When Should You be Draining a Water Heater?
To begin in our guiding you to safely begin Draining a Water Heater, we first start off by explaining why you even do this, to begin with. Experts, like the number one Raleigh plumbers at Poole’s Plumbing, recommend that you drain your water heater every 6-12 months.
This is so any buildup or sediment that may gather is cleared out. If this is not done, the buildup can cause your water heater to have to work harder to heat the water. Thus, the water heater is forced to unnecessarily use more energy. Consequently, this leads to higher energy bills, as well as shortening the life span of your unit.
Preparation and What to Expect When Upon Draining
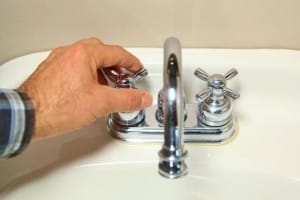
Open the faucets relieves pressure before you drain the water heater.
One thing that you should be prepared for when Draining a Water Heater is to have/create a leak. This is because there is a good chance that once you open up the drain valve to empty the contents, it will not close again.
This is common when draining a water heater. In actuality, the 6-12 month recommended period is also a good time frame to replace the drain valve. These parts are usually cheap plastic. Regardless, as the valves get older it becomes less likely to completely close anyhow. If the time has come and the valve will no longer shut, then put a cap over it and replace it completely.
A Seven-Step Plan for Draining a Water Heater
- Start with a Quick Flush- It would seem the first thing to do before Draining a Water Heater would be to shut off the water. However, before doing that, try flushing the unit a bit while the water pressure is still on. To do this, simply connect a garden hose to the drain for flushing. The pressure will blow out sediment that has built up in the valve. Doing this will help your tank drain faster. It is worth noting that if a large amount of sediment comes out, you can repeat this method of flushing a few times.
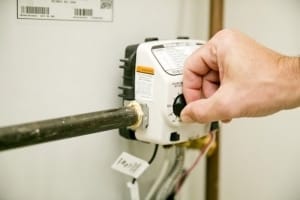
- Turn the Water Heater Off – Our next step in Draining a Water Heater starts by shutting off the gas. In the case that you have an electric water heater, shut off the power instead. Then, you will want to shut the water off entirely. You can do this by either using the valve in the cold water pipe above the water heater or the houses’ main water supply valve. Before moving along to our next step, test the water faucets to make sure the pressure is off, by simply turning them all on and checking for hot water.
- Open the Drain Valve- With a hose attached, next, we open up the drain valve. You will not see much drain out until you release the vacuum in the tank. To do this you must allow air into the tank. Do this by removing one end of the hot water pipe above the water heater. Once removing that end, pull the pipe to the side just a bit and the water will begin to pour fastly from the drain.
- Use Water to Flush the Tank- Once you have fully drained the tank, you can flush it out using a few gallons of water at a time. To do this, turn the water on for a few seconds at a time and let the water drain out. During this process, leave the hot water side pipe disconnected until flushing is complete. Reconnect the “hot side” pipe before refilling.
- Refill the Water Heater- The obvious next step after Draining a Water Heater is to refill it. Before you begin doing this though, you must disconnect the drain hose and shut off the drain valve. Also, don’t forget to reconnect that hot water pipe and tighten it well. At this point, you can turn the water heater’s water back on. Be sure to open up the “hot side” of a fixture in your house. Then, just leave the fixture running until all of the air is out of the lines. At this point nothing but water should be coming through. Then, you can turn back off the water.
- Relight the Water Heater- The next step in Draining a Water Heater is to relight the pilot light. Again, if you have electric as opposed to gas, this is when its safe to turn the power back on. You should have hot water back with in an hour or so.
- Check the Drain Valve- The final step in our “Draining a Water Heater” tale. Check to see if your water heater drain closed correctly by looking for leaks at the spout. If the valve does not close completely, you can put a cap on it or replace the valve entirely.
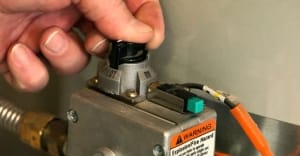
After refilling the unit, you will then relight the pilot light.
The pros at Poole’s Plumbing became the most trusted name in Raleigh water heater installation through keeping ahead of the curve and staying on top of all the latest innovations. In their two decades of unmatched service to the Raleigh and Triangle area, they have earned the trust of the customer through offering advise such as this quick tutorial on Draining a Water Heater. Poole’s Plumbing work with the top names in water heaters and can installer service your unit, as needed. For more information on the Poole’s “Water Heater” guarantee, visit poolesplumbing.com.