Plumbing News and Tips for Homeowners in the Raleigh NC Area, New Product Reviews, Water Heaters and Tankless water heater advice from local certified plumbers.
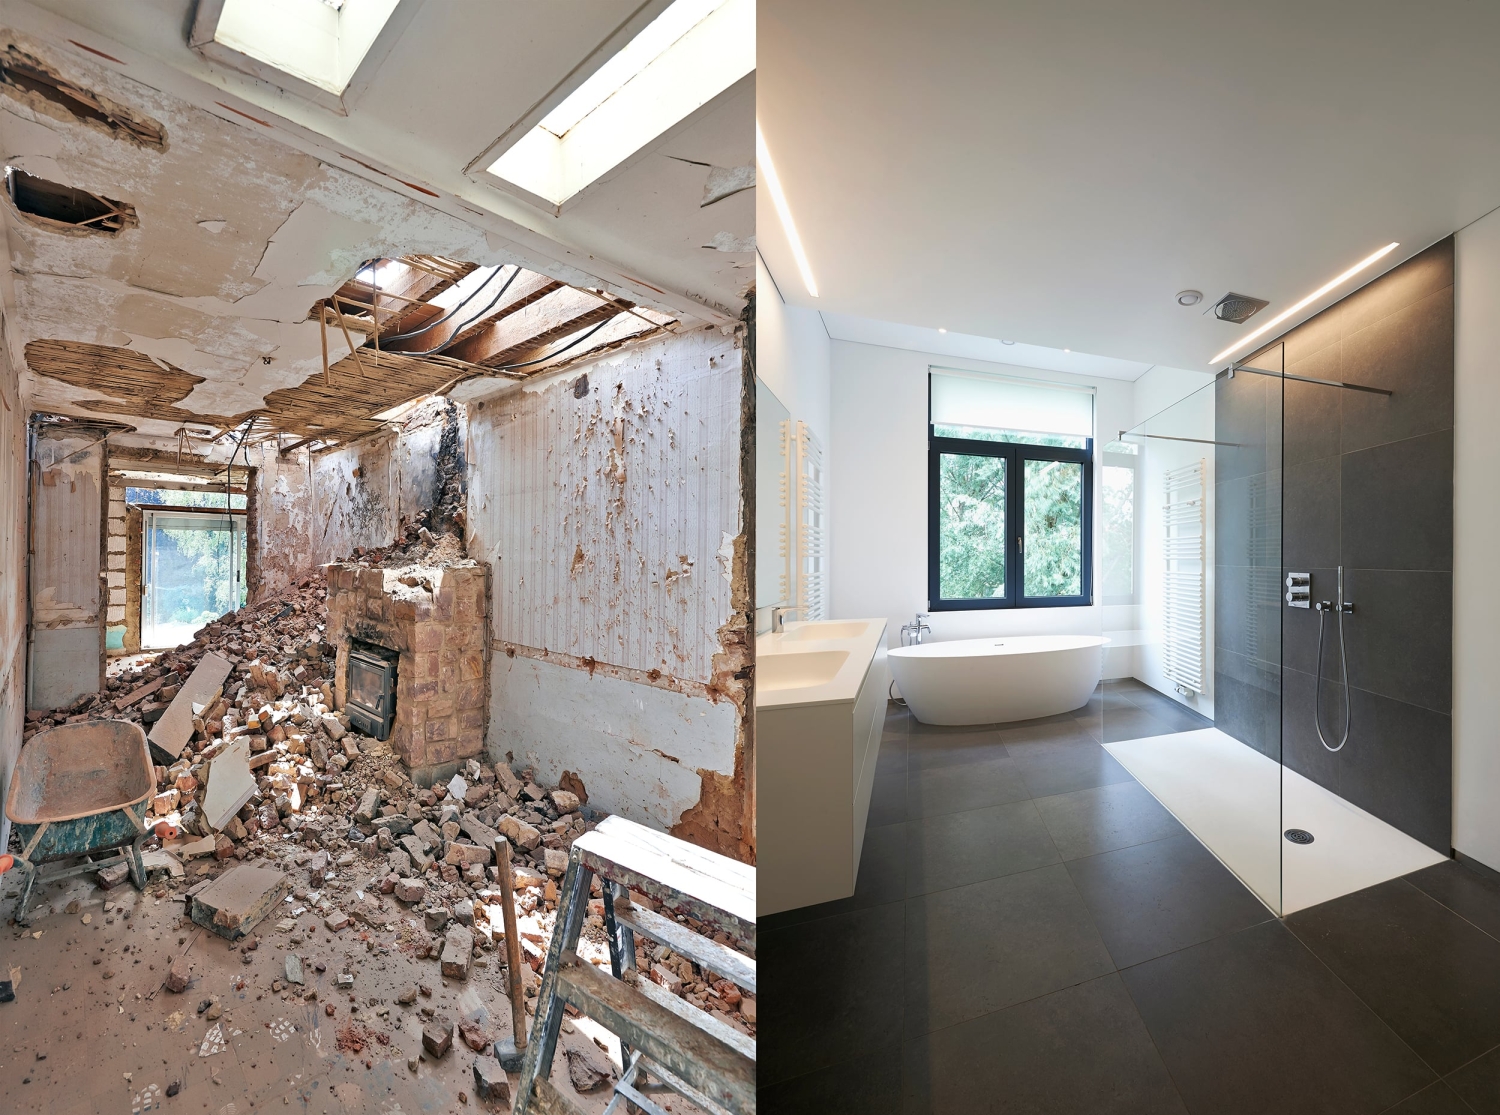
Bathroom Remodel: How Much Does it Cost to Put in a Full Bathroom in Your Basement? If you’re looking for an affordable way to add value and convenience to your home, adding an additional bathroom to your basement or another living space is an excellent choice. But how much will this project cost you?
The answer may depend on several factors, such as the size of the bathroom if it’s a bathroom remodel or a new bathroom, the materials used, and even the local labor costs. Generally speaking, installing a full bathroom in the basement can range from around $7,000 to upwards of $30,000.
The average cost for a basic complete bathroom installation is usually around $15,000 for labor and material costs. This includes tiling the floors and walls, installing a shower or bathtub, plumbing the fixtures, and running new electrical wiring.
In addition to the labor and material costs, you’ll need to factor in additional expenses for any necessary permits or inspections from your local municipality. Depending on your home’s location, this can range from several hundred dollars to over $2,000.
If you want to maximize your budget for your bathroom remodel, you can cut costs in a few ways. For example, you could do the work yourself instead of hiring a professional plumber or contractor. Additionally, opting for lower-end plumbing fixtures and finishes will reduce the project’s overall cost.
No matter what bathroom design options you choose, it’s essential to consider the long-term value a basement bathroom can bring.
From providing greater convenience and comfort to increasing your home’s resale value, it’s an investment that will pay off for years.
Ultimately, the cost of installing a full bathroom in your basement depends on many factors and is ultimately up to you. You can find the best solution that fits your budget and lifestyle by carefully considering all available options.
Good luck!
Bathroom Remodel
Note: Keep in mind that this is just a general guide to the costs associated with basement bathroom installation; it’s highly recommended to consult with a professional contractor for a more accurate cost estimate. Additionally, be sure to follow all local safety and building codes when undertaking any home improvement projects. Doing so will ensure your basement bathroom is safe and up to code.
Additionally, there are various financing options available if you need help covering the upfront cost of your project. Loans from online lenders, credit unions, or even local banks can be great resources for getting the money you need to complete your basement bathroom renovation.
No matter what route you take, installing a full bathroom in your basement is an excellent way to transform your home and add significant value. With enough research and planning, you can easily find the best options for your budget and lifestyle needs.
Contact Pooles Plumbing for all your plumbing needs. Happy renovating!
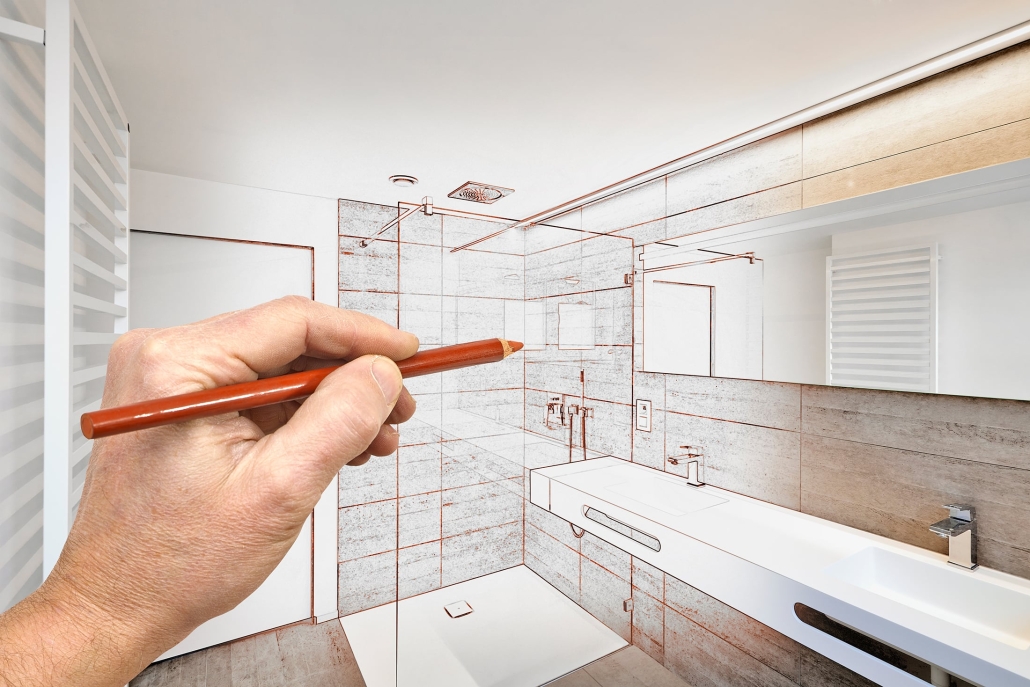
Choosing Your Plumbing Fixtures and the Benefits of Having a Professional Plumber when it comes to plumbing fixture selection, you must ensure that your choices are correct. Not only do they need to look good, but they also have to be installed correctly for the best results. That’s why working with a professional plumber when selecting them is so important. Here are some of the most significant benefits you get from getting a professional plumber on the job:
Professional Advice and Guidance
A significant benefit of having a professional plumber choose your plumbing fixtures is that they will provide valuable advice and guidance. They know what works, what doesn’t, and what will ensure long-lasting results. Before purchasing anything, they can help you understand the various options and features of the products you’re considering.
Access to Quality Products
A professional plumber can give you access to quality products from trusted name brands that may not be available in regular stores. A plumber usually deals directly with manufacturers, providing them access to more materials and features.
Getting the Job Done Right
While installing plumbing fixtures yourself may seem easy, a professional plumber will know how to do the job efficiently and correctly – without any costly or dangerous mistakes. Plumbers are also better equipped with the right tools for the job, saving you time and money in the long run.
Extended Warranty
When you work with a professional plumber, they can provide an extended warranty on your plumbing fixtures. This can help protect against potential issues arising over time or improper installation. Knowing you’re covered if something goes wrong is also good peace of mind.
Professional plumbing work is an investment that will pay for itself in the long run. Not only can you be sure that your fixtures are properly installed and functioning correctly, but you’ll also have access to quality products, professional advice, and extended warranties – all of which can help ensure that your home or office plumbing remains in great shape for years. Do your research and find a reputable, experienced plumber to work with – the results will be well worth it.
Considerations for Different Plumbing Fixtures
When selecting plumbing fixtures, there are several things you need to take into consideration. For example, if you’re looking at faucets, ensure they fit your sink in size and style. Toilets come in various styles, sizes, and features – make sure the one you choose matches your bathroom’s decor. Regarding showers, you need to consider water pressure, drainage systems, and other factors like whether or not the house is heated or cooled.
No matter what plumbing fixtures you’re considering, it’s always best to consult a professional plumber. They can offer valuable advice and guidance you may not get from any other source. So if you’re looking to upgrade, remodel or start fresh, bring a professional plumber in on the job!
An Experienced Professional Plumber Gives You Peace of Mind
When it comes to your home or office plumbing, ensuring the job is done right is essential. An experienced professional plumber will know how to properly install and maintain all plumbing fixtures. From faucets, toilets, and showers to sinks and water heaters – they can help ensure everything is up to code and working efficiently. Knowing that your plumbing is in good hands gives you peace of mind.
When working with a professional plumber, always ensure you get references and read reviews to ensure their quality of work is up to par.
A professional, reliable plumber will be more than happy to provide this information. Investing in hiring a professional plumber for selecting and installing plumbing fixtures can help save you time, money, and headaches in the long run – so pay attention to quality!
Investing in professional plumbing services is always a smart move. From getting the best products to avoiding costly mistakes, bring a professional plumber into your plumbing projects. With their knowledge, expertise, and access to quality materials – you can be sure that your fixtures will be installed correctly and look great for years to come.
From selecting the right fixtures to getting the job done right, a professional plumber can provide invaluable services you won’t get anywhere else. So don’t settle for anything less – ensure your plumbing is in good hands with an experienced professional plumber!
Plumbing Upgrades and Remodels
A professional plumber is essential for remodeling or upgrading your plumbing fixtures. Not only can they help you select the best products for your needs, but they can also ensure that everything is installed correctly for optimal performance. From selecting suitable faucets and toilets to replacing water heaters, they can provide valuable advice, guidance, and access to quality materials.
So, whether starting from scratch or upgrading your existing plumbing fixtures, bring a professional plumber into the process. Their experience and expertise can help take the guesswork out of selecting and installing plumbing fixtures in your home or office. Investing in professional plumbing services is an investment that can pay off in the long run – so don’t settle for anything less!
By having a professional plumber involved in your plumbing projects, you can have peace of mind knowing that the job is done right and your fixtures will last for years. So don’t go it alone – bring a professional plumber into the process when choosing and installing plumbing fixtures!
Whether you’re starting a new project or just looking to upgrade your existing fixtures, bring a professional plumber on the job. With professional expertise and access to quality materials, they can help ensure everything is done correctly and your plumbing looks great for many years.
Don’t settle for anything less – bring a professional plumber into your plumbing projects!
5 Signs You May Need to Call a Professional Plumber – If you’re dealing with a plumbing issue, telltale signs often warrant calling in the professionals. However, knowing when to call a plumber may save you time and money in the long run. Here are five characters that you need to contact an experienced plumber right away:
Leaky Faucets or Pipes — If you notice any signs of water leaking from your home’s faucets, pipes, or other fixtures, it’s time to call a professional plumber. This could be anything from dripping taps to pools of water forming around the base of a pipe or appliance. Not only can leaks damage your home, but they can also waste water and increase your energy bills.
Wastewater Backup — If you notice wastewater backing up into sinks, showers, or tubs, this indicates a significant plumbing problem requiring an experienced plumber’s help. This could be caused by anything from broken pipes to clogged drainage systems. The longer you wait to call for help, the more likely the problem will worsen and cause further damage.
Leaking Toilets —Toilet leaks can be challenging to detect since they’re usually hidden beneath your bathroom floor. If you notice any signs of water around the base of your toilet, this could be a warning sign that something isn’t quite right. It’s best to have a professional plumber inspect the issue immediately to avoid further water damage and costly repairs.
Unusual Noises or Odors — If you hear any strange noises coming from your pipes or detect an odd odor in your home, it could be a sign of a plumbing issue that needs to be addressed. Unusual noises could indicate a blockage or a problem with your water pressure, while strange odors could suggest the presence of a gas leak. It’s best to get these issues sorted out as soon as possible, so don’t hesitate to call a professional plumber for help.
Low Water Pressure — If you notice that your water pressure has dropped, it could be a sign that something is blocking water flow into your home. Low water pressure can often result from broken pipes, corroded fittings, or clogged filters. In either case, calling an experienced plumber to investigate as soon as possible is essential.
Whether you’re dealing with a small leak or a significant plumbing issue, it’s best to call professionals for help. An experienced plumber can quickly diagnose and repair any plumbing problem, saving you time and money in the long run. If you’ve noticed any of the signs listed above, don’t hesitate to contact your local plumber immediately.
https://www.poolesplumbing.com/wp-content/uploads/5-Signs-You-May-Need-to-Call-a-Professional-Plumber.jpg600900John Drenkhahnhttps://www.poolesplumbing.com/wp-content/uploads/PoolesPlumbing_Logo_FullColor_LightBG_RGB-1.svgJohn Drenkhahn2023-09-07 15:33:282023-09-07 15:33:315 Signs You May Need to Call a Professional Plumber
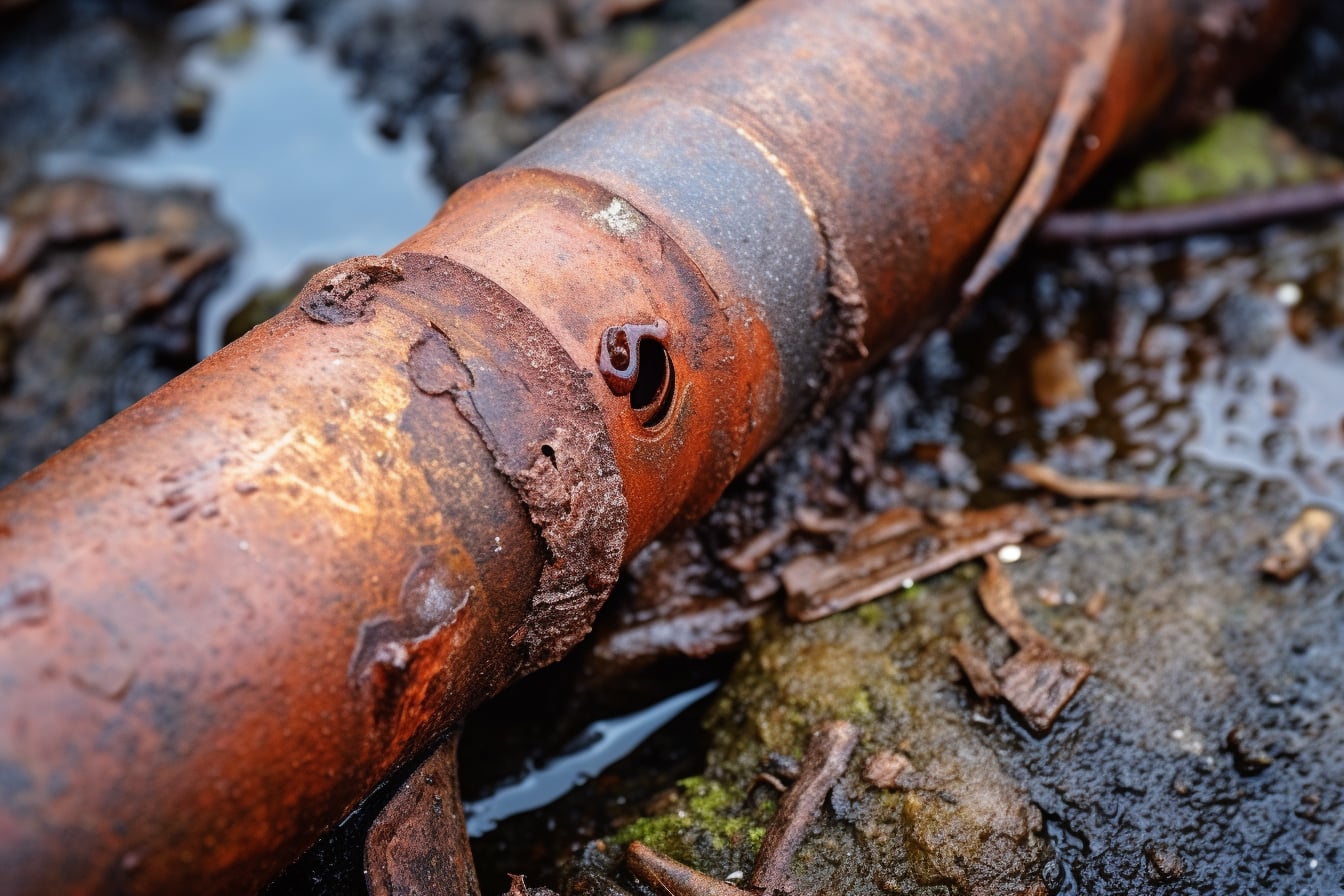
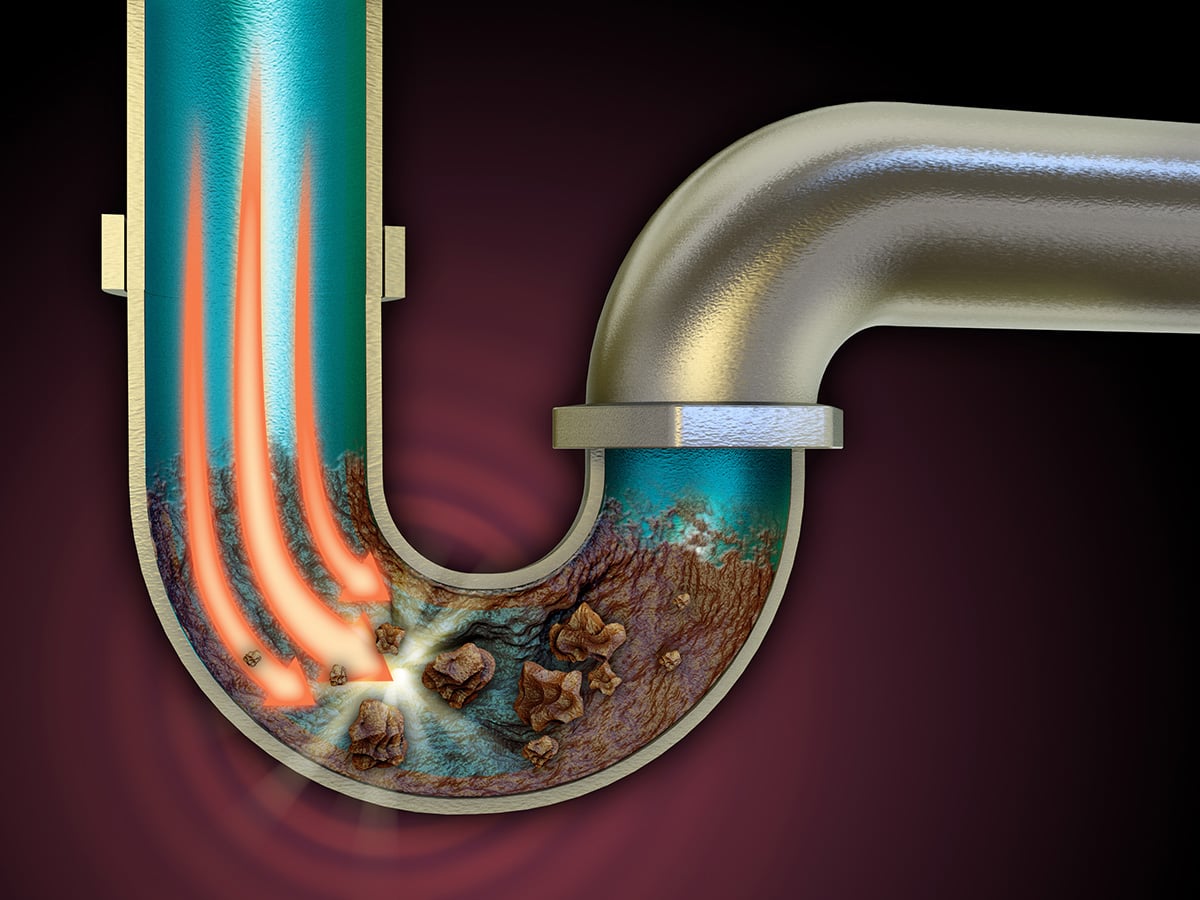
Source of Rusty Water, Once you have identified rusty water, the next step is to determine its source. Often, rusty water originates from one or more of the following sources:
Outside sources, such as healthy water containing high iron levels
If you need help determining where the rusty water might come from, let’s start by visually inspecting all exposed piping in your home. Look for any areas where rust has accumulated and note any pipe corrosion or other signs indicating something wrong with the piping. Additionally, check the area around your water heater for any leaks causing rust buildup near the unit.
If you don’t find any signs of rust or corrosion around the exposed piping, your next step is to check your water heater for signs of decay or rust inside the tank. You can do this by draining a few gallons from the bottom of the tank and inspecting it for any discoloration or debris that may indicate a problem.
Finally, suppose all else fails, and you still can’t determine where the rusty water is coming from. In that case, it is time to call a professional plumber to inspect your plumbing system and diagnose any issues they find. A professional will be able to check your entire plumbing system more thoroughly than you can on your own, ensuring that no underlying issues are left unresolved.
By following these steps, you should be able to identify and address the source of rusty water in your plumbing system. Doing so will help ensure that your home remains clean and safe while protecting any appliances or fixtures from unnecessary damage due to rust buildup.
If you are dealing with rusty water regularly, have a professional inspect your plumbing annually to avoid any long-term issues caused by corrosion or rust accumulation; taking proactive measures now can save you time, money, and hassle down the line!
Next, it’s essential to understand the cause of rust in your plumbing system. High levels of dissolved iron in the water supply usually cause rust. If you have hard water, there could be elevated amounts of iron present, causing discoloration or rust buildup over time. Additionally, if any exposed piping has gone without proper maintenance for some time, corrosion and rust accumulation could occur due to contact with moisture from the air or surrounding environment.
To reduce the risk of rusty water in your home, maintain all exposed pipes and fixtures regularly and inspect your water heater for signs of corrosion or rust accumulation. It’s also essential to periodically test the quality of your home’s drinking water to ensure it is safe and free from any potential contaminants.
By following these steps, you can help protect your plumbing system from developing problems due to rusty water and keep your home running smoothly. If you’re ever in doubt about what could be causing an issue with your plumbing system, don’t hesitate to call a professional plumber for assistance!
The source of rusty water can often remain hidden until it has caused significant damage to both the plumbing system and the fixtures that rely on it. That is why it is so important to act quickly and take steps to identify the source of rusty water if you are ever dealing with it in your home. Follow these tips to help ensure that you can find its source and address any issues it may be causing.
By staying on top of regular maintenance and inspecting exposed piping for rust or corrosion, you can watch for any potential problems before they worsen. Also, regularly examine your water heater since corrosion or rust buildup inside the tank could lead to rusty water coming from your faucets or showerheads. Suppose none of these measures seem to work, and you still need to find out where the rusty water is coming from. In that case, it’s time to call a professional plumber to help you diagnose the issue and take the necessary steps to get your plumbing system back up and running correctly.
www.poolesplumbing.com
https://www.poolesplumbing.com/wp-content/uploads/Finding-the-Source-of-Rusty-Water-copy.jpg8961344John Drenkhahnhttps://www.poolesplumbing.com/wp-content/uploads/PoolesPlumbing_Logo_FullColor_LightBG_RGB-1.svgJohn Drenkhahn2023-08-25 12:28:382023-08-19 12:33:47Source of Rusty Water
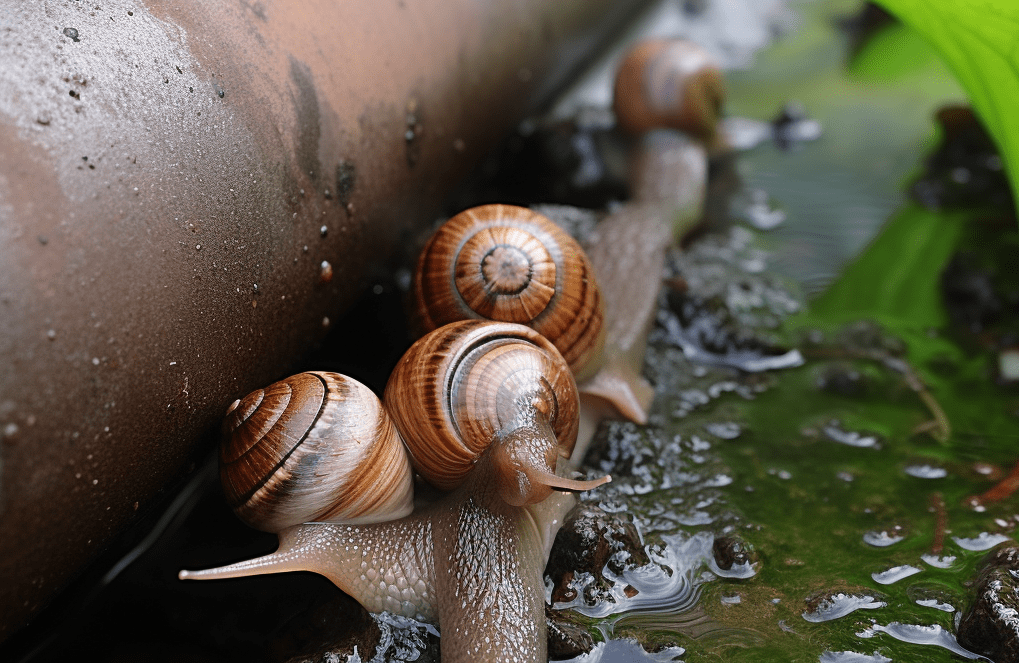
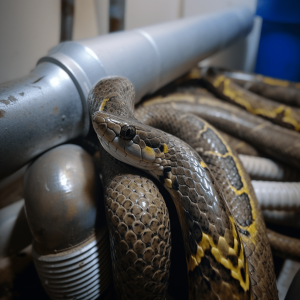
Critters in my Pipe!, Most people don’t expect to find unusual critters in their plumbing pipes, but it can happen. From tiny slugs to much larger creatures, your pipes may be home to surprising visitors. Here are three crazy critters you might find lurking in the depths of your plumbing system.
First up is the American Toadfish (Opsanus tau). This North American species has been known to get inside pipes and survive for long periods. It has a flat head and sharp spines along its back, allowing it to squeeze through tight spaces. The American Toadfish is an opportunistic feeder, so if you have a leaky pipe, you may soon have a resident toadfish feasting on all sorts of tasty treats.
Next is the North American Wood Turtle (Glyptemys insculpta). This species can get inside pipes through openings as small as two inches wide! It prefers to live in wetlands and streams but may find its way into your plumbing system if it’s looking for food or shelter. The North American Wood Turtle has an elongated carapace or shell that can reach up to eight inches long – much larger than the tiny slugs you usually find in your sink!
Finally, we have the Eastern Rat Snake (Pantherophis alleghaniensis). This species tends to hang around houses and other artificial structures because it likes to prey on rodents like mice and rats. If a rat snake finds its way into a drain pipe, it can get stuck or drown if the water level rises. So if you have a noisy rat in your plumbing system, check for signs of snake activity before repairing!
Keeping critters out of your plumbing system and pipes can be a challenge, but there are steps you can take to prevent them from getting in. So, with proper maintenance and preventive measures, you can ensure your pipes remain free of unwanted visitors.
One of the best ways to keep critters out of your plumbing system is to ensure that all outdoor pipes and drains are properly sealed. This means sealing cracks or openings with either metal flashing or expanding foam sealant. Additionally, you should check for entry points near the roofline or foundation, as these can be vulnerable areas for animals to sneak in.
It’s also important to regularly inspect your pipes and drains for any signs of damage. If you notice a crack or hole, repair it immediately using the appropriate materials. It would help to use high-quality screens on all drain openings to prevent small animals from entering.
Finally, if you have a septic tank, make sure it is checked and maintained at least once a year. Septic tanks that become clogged are more likely to attract pests like rats and snakes looking for food and shelter. By ensuring that all components of your plumbing system are working correctly, you can help keep critters out more effectively.
These are just three crazy critters that may find their way into your plumbing pipes. While they can cause problems like clogs and leaks, most are harmless and will eventually move on. However, if you suspect an animal is living in your pipes, contact a professional plumber right away so they can take care of the problem safely and quickly.
That way, you can be sure that your plumbing is critter-free!
https://www.poolesplumbing.com/wp-content/uploads/Crazy-Critters-in-my-Pipe.png6631019John Drenkhahnhttps://www.poolesplumbing.com/wp-content/uploads/PoolesPlumbing_Logo_FullColor_LightBG_RGB-1.svgJohn Drenkhahn2023-08-22 12:17:192023-08-19 12:21:33Critters in my Pipe!
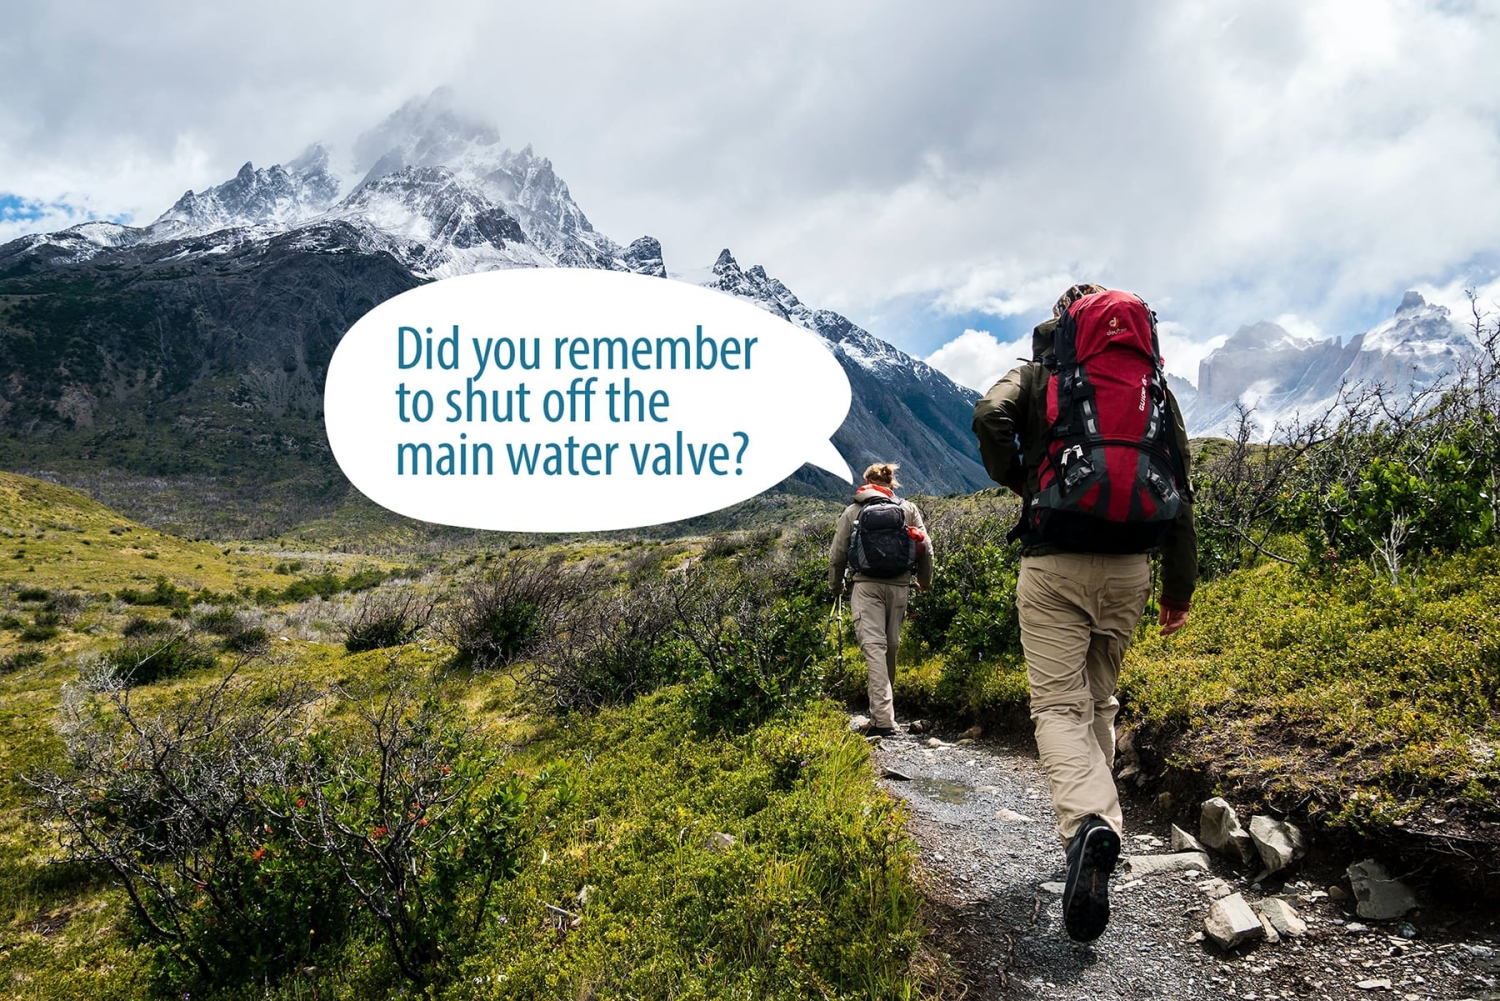
Vacation Plumbing Checklist, Vacations and time off are a great way to take a break from the daily grind and schedule and reconnect with family, friends, and yourself. Whether planning a beach getaway or a city sightseeing tour, taking time off to explore new places is integral to life. But one crucial task must be taken care of before you can truly enjoy your vacation: preparing your home for your absence.
One of the most critical steps is ensuring that your plumbing system can handle emergencies while you’re away. To ensure everything runs as it should, here are five key priorities that should be taken care of:
Here are five key priorities that should be taken care of:
Check for leaks – Inspecting all pipes and fixtures for any signs of water leakage before leaving for vacation is always wise. Even small drips can quickly add up and cause extensive damage if left unchecked, so repair them immediately or call a plumber if needed.
Clean out drains – Clogged drains often become unsightly messes very quickly, so take the time to check that all your gutters are clear before you leave. Flushing hot water through the sinks and showers can help move along any obstructions in the pipes and save you from returning to unpleasant surprises!
Shut off the main water valve – Turning off the main valve helps prevent further damage if there is an emergency while you’re away. Doing this will also help keep bills down since it stops the system from using additional water when not needed during long vacancy periods.
The lower temperature on the hot-water heater – Setting your hot-water heater at a minimum temperature of 55°C helps conserve energy use and costs while providing enough heat for everyday needs when you return home. Additionally, it will help prevent bacteria from growing in the tank while you’re gone, which can lead to health problems down the line!
Check smoke and carbon monoxide detectors – It’s always a good idea to ensure that smoke and carbon monoxide detectors work and function properly before leaving for vacation. This ensures that the alarm will warn those inside the home of potential danger if there is an issue with gas or water appliances, like stoves or boilers.
Taking care of these plumbing priorities before heading out on vacation gives you peace of mind that your home will be safe and secure in your absence. Of course, if you’re ever in doubt or don’t feel comfortable tackling a plumbing issue yourself, it’s best to call a professional who can handle any problems quickly and safely.
Ultimate Plumbing Guide for Homeowners, when it comes to plumbing, many homeowners are intimidated by the thought of managing their repair tasks. While some plumbing issues may seem too complex for a novice to tackle, having a basic understanding of how your plumbing system works may help save tremendous time and money in the long run.
By following a few easy-to-follow steps: we can ensure that our home’s plumbing needs are handled.
1. Determine where the problem lies: If you notice any signs of plumbing trouble, such as strange noises, slow-draining sinks, or wet spots on walls or floors, it is essential to identify where the issue originates before attempting any repairs. By tracing the water flow through your home’s plumbing system, you can pinpoint the source of the problem and plan how to repair it accordingly.
2. Identify the right tools: Every plumbing job requires different devices, so ensure you are equipped with the correct ones before beginning any work. For minor repairs such as replacing a faucet washer or tightening a loose pipe connection, essential equipment like adjustable wrenches and screwdrivers will do just fine. However, more complex jobs may require specialized tools such as drills and drain snakes.
3. Acquire quality supplies: Investing in the best possible stores is essential to completing a successful plumbing repair job. Start by researching various products on the market and looking for any customer reviews available, as this will help you to identify the best-rated supplies for the job. It could also be beneficial to purchase products designed for your home’s plumbing system, as using incompatible parts can cause significant damage in the future.
4. Prioritize safety: Working with plumbing systems involves contact with water, electricity, and sharp tools, so individuals must take all the necessary safety precautions for themselves, their home, and their family before beginning any repair work. Wear protective gloves and glasses while working on your system, and ensure that any electrical components are properly grounded before attempting any repairs. Finally, double-check that all connections are secure and do not exceed their recommended torque limits before testing the system again.
This ultimate plumbing guide will help you make the most of your home’s plumbing system and ensure that any repairs are done safely, efficiently, and effectively. With some research and preparation, even those with limited experience can tackle their plumbing jobs confidently.
Contact www.poolesplumbing.com
https://www.poolesplumbing.com/wp-content/uploads/Ultimate-Plumbing-Guide-for-Homeowners.jpg18002000John Drenkhahnhttps://www.poolesplumbing.com/wp-content/uploads/PoolesPlumbing_Logo_FullColor_LightBG_RGB-1.svgJohn Drenkhahn2023-07-29 10:09:342023-07-29 10:09:37Ultimate Plumbing Guide for Homeowners
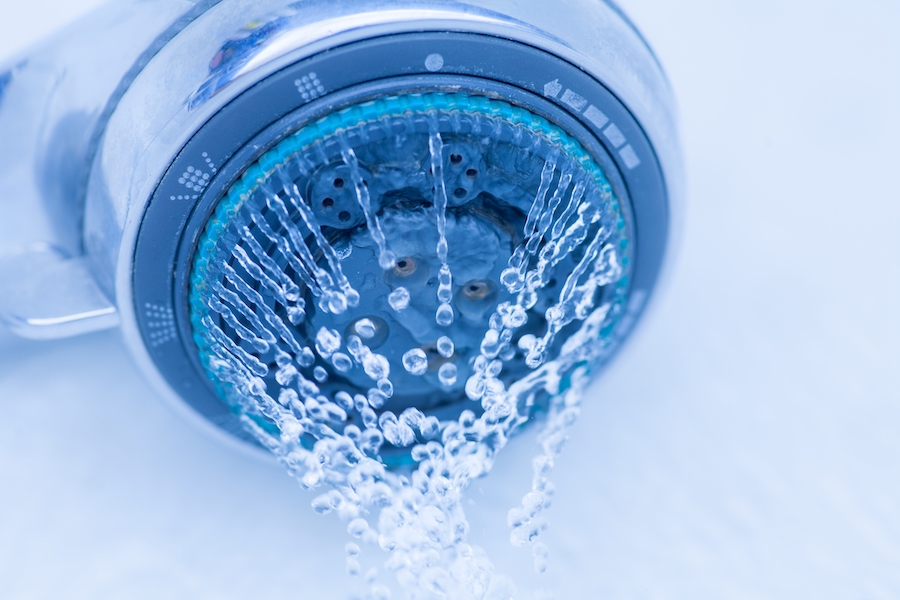
The Effects of Summer on Plumbing. Summertime is a season of fun and relaxation, but it can also be when our plumbing systems are under extra strain. With increased water usage due to outdoor activities and extreme temperatures that can cause pipes to expand or contract more rapidly than usual, it’s essential to take the necessary precautions to protect your plumbing system during the summer months. From inspecting your pipes for any cracks or leaks before summer hits to wrapping exposed pipes in insulation or covering them with shade, there are many things you can do now that will help save you time and money.
As the temperature rises, there’s a lot of talk about how summer can affect our bodies and minds. But what about our plumbing? Summer can significantly affect your plumbing system’s condition – from increased water usage to potential breakdowns due to extreme temperatures. Let’s look at summer’s effect on our plumbing systems to understand these implications.
One way that summer affects our plumbing is through increased water use. With longer days and warmer weather, it’s common for people to spend more time outdoors doing activities such as swimming, gardening, and washing their cars. This increased outdoor activity means more water is being used from your home’s plumbing system than usual. If you’re not careful, this can cause strain on your plumbing and even lead to a broken pipe.
Summer can also affect the condition of your pipes due to extreme temperatures. Pipes exposed to direct sunlight can experience higher-than-normal or even average temperatures, which can cause them to expand and contract more rapidly than usual. This stresses the lines and increases their chances of cracking or bursting, leading to costly repairs. Wrap any exposed pipes in insulation or shade them with some covering to reduce this risk.
It’s also important to know how summer storms affect your plumbing system.
It’s also important to know how summer storms affect your plumbing system. Heavy rainfalls often result in flooding, quickly leading to sewer backups or overflows. If you haven’t had your pipes checked by a plumber in a while, now is the time to do so – it’s best to be prepared for the worst rather than scrambling when it happens.
Finally, summertime can mean more pests are entering our homes. Ants, cockroaches, and rodents are all drawn to water sources like sinks and toilets. To prevent these critters from entering your home through the plumbing system, ensure all drains are securely covered and any leaks are immediately fixed.
Overall, summertime can significantly affect our plumbing systems if we don’t take the necessary precautions. Taking steps such as wrapping exposed pipes in insulation or fixing any leaks can help reduce the risk of costly repairs. Taking care of your plumbing system now can save you time and money – so don’t hesitate to have a plumber inspect your home before summer rolls around!
As always, it’s best to be proactive when caring for your plumbing system. From increased water usage to extreme temperatures, many potential pitfalls come with adjusting our lives during summertime. Remember these tips this season, and your plumbing system will thank you!
So don’t hesitate – start taking care of your plumbing system today!
https://www.poolesplumbing.com/wp-content/uploads/The-Effects-of-Summer-on-Plumbing.png10241024John Drenkhahnhttps://www.poolesplumbing.com/wp-content/uploads/PoolesPlumbing_Logo_FullColor_LightBG_RGB-1.svgJohn Drenkhahn2023-07-12 18:52:072023-07-12 18:52:09The Effects of Summer on Plumbing
The number one question people ask about plumbing is: How do I fix a clogged drain?
Having clogged drains is one of the most common plumbing issues homeowners face, ranging from minor to severe problems. Fortunately, several ways exist to identify and resolve the issue without calling a professional.
First, it’s essential to determine if the clog is in your main line or a branch line. This can be done by pouring water slowly into both lines (if possible). If the water takes a long time to flow down the pipe, you likely have a clog in that line. Once you’ve identified the problem, it’s time to take action!
The traditional plunger is one of the most common methods to unclog a drain. To use it, you’ll need to plug the adjacent sink or tub so that air pressure can build up in the pipe and push out the clog. However, if this doesn’t work after several attempts, it’s time to move on to other solutions.
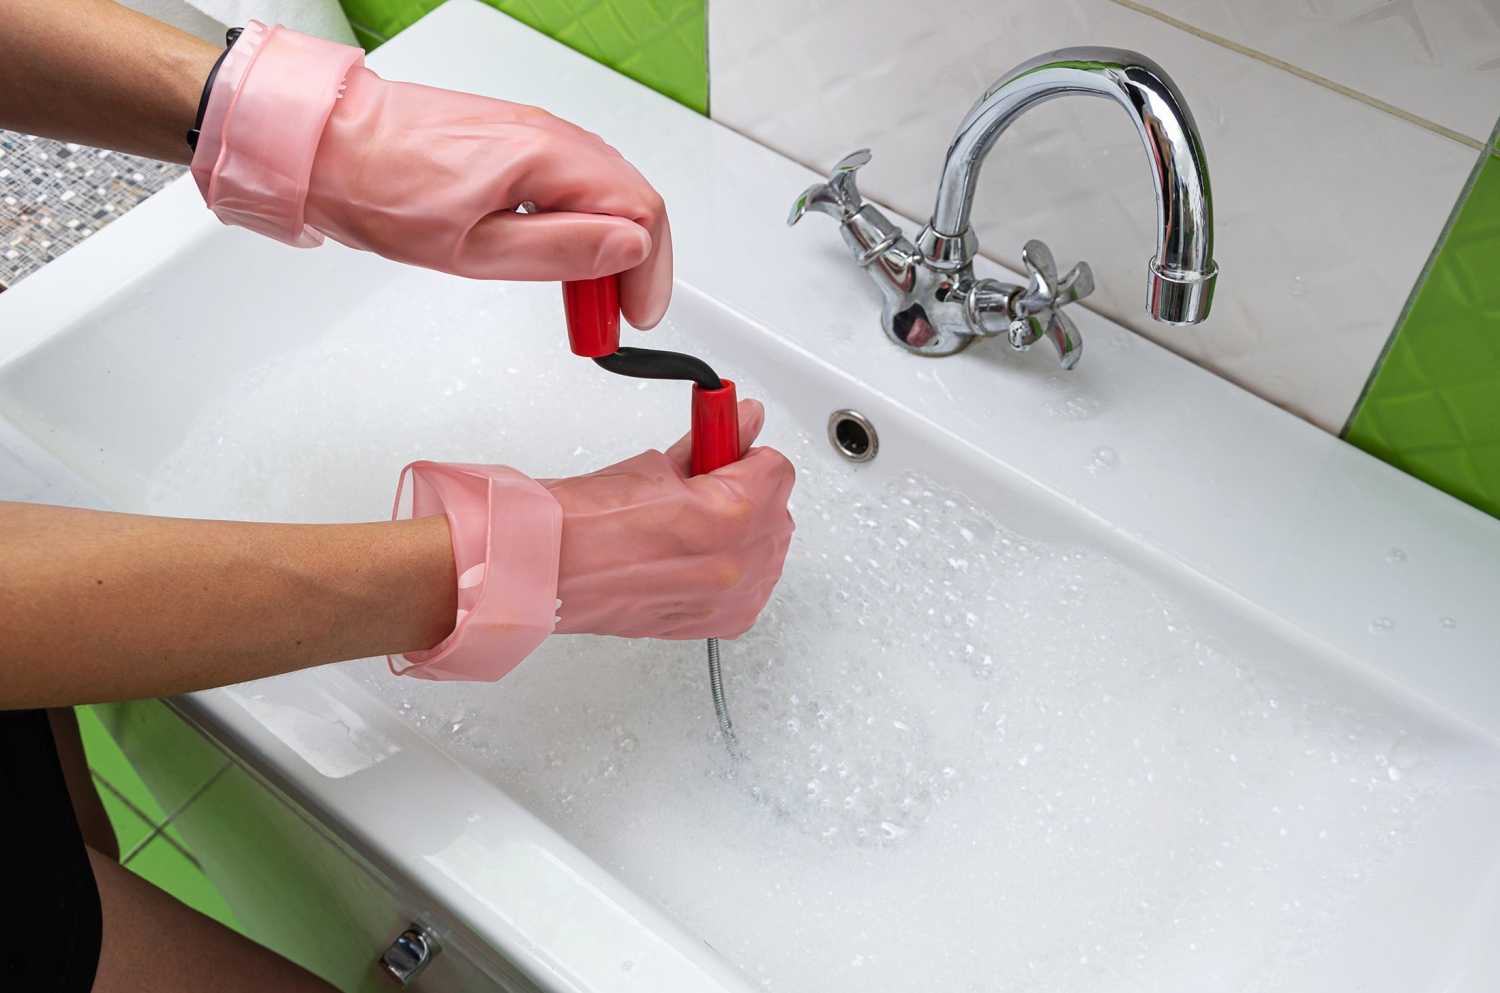
A drill (a snake) is another great option for clearing clogs from any drain pipe. The drill has a long wire-like attachment that can be fed through narrow pipes and bends to remove debris blocking the water flow. This should help eliminate your clogged pipes correctly without calling a professional plumber.
Lastly, consider using a chemical drain cleaner if all else fails. Chemical drain cleaners are sold in most hardware stores and can quickly dissolve clogs with corrosive chemicals. However, it’s essential to use caution when handling these products since they can cause irritation or even burns to the skin. Furthermore, chemical cleaners should not be combined with other solutions such as plungers or augers – use one method at a time!
Clogged drains are an unfortunately common plumbing issue that homeowners have to deal with occasionally. So with the proper knowledge and tools, you can care for almost any clog without calling a professional plumber. Understanding what causes clogging and how to address it correctly can save you time, energy, and money in the long run.
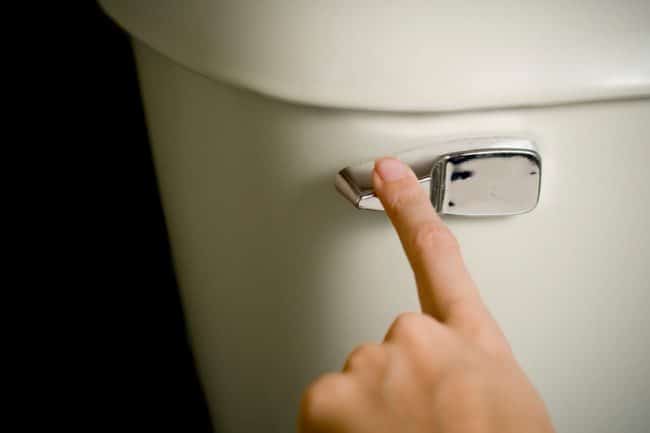
Another common plumbing issue that many homeowners face and ask about is a running toilet.
How do I stop my toilet from running?
So, a running toilet can be caused by a few issues, such as an improperly configured flapper, an old or worn float ball, or a broken fill valve. In most cases, the problem can be resolved with basic troubleshooting and DIY repair:
Inspect the flapper to ensure it is positioned correctly over the drain hole at the tank’s bottom. If not, adjust its position to seal off the tank’s water supply when appropriately flushed.
Check for mineral deposits on the float ball or fill valve; these deposits can sometimes prevent them from sealing off the water supply correctly and cause your toilet to run continuously.
Inspect the fill valve for any visible cracks or other damage and replace it if necessary.
With these steps in mind, you should be able to fix a running toilet successfully!
Good luck! And remember – when in doubt, call a professional plumber! They have all of the right equipment and knowledge needed to get your plumbing back up and running like new quickly.
What you need to know during a Boil Water Advisory. A boil water advisory is issued when drinking water quality is compromised or may be contaminated with microbes or other hazardous materials. Boil water advisories are typically given when there has been a break in the supply line, when a sanitary survey reveals bacteria or other contaminants or when natural disasters have caused flooding that could put drinking water at risk of contamination. Following all instructions carefully during a boil water advisory is essential, as this will help protect you and your family from potential harm.
When a boil water advisory is issued, it means that there is a risk of potential contamination in the drinking water supply. This could be due to a break in the supply line or pipes, infiltration of surface water, or cross-connection between different water sources. Additionally, natural disasters such as flooding can cause significant disruption to the water systems and increase the chance of contaminated drinking water. These other Bacteria, such as E. coli and coliform, can enter the drinking water supply during these situations, making it unsafe to consume without boiling first. It is essential to adhere to any boil advisories issued by your local health department or water supplier to protect your health and safety.
If you have been issued a boil water advisory, taking the necessary steps to ensure your drinking water is safe is essential. Here are some key things to keep in mind when dealing with a boil water advisory:
Boil Water Advisory
Boil your drinking and cooking water for at least one minute. As this will help kill any bacteria or other contaminants that may be present in the water.
Avoid using tap water for brushing teeth, washing dishes, food preparation, or making ice cubes until the boil order has been lifted.
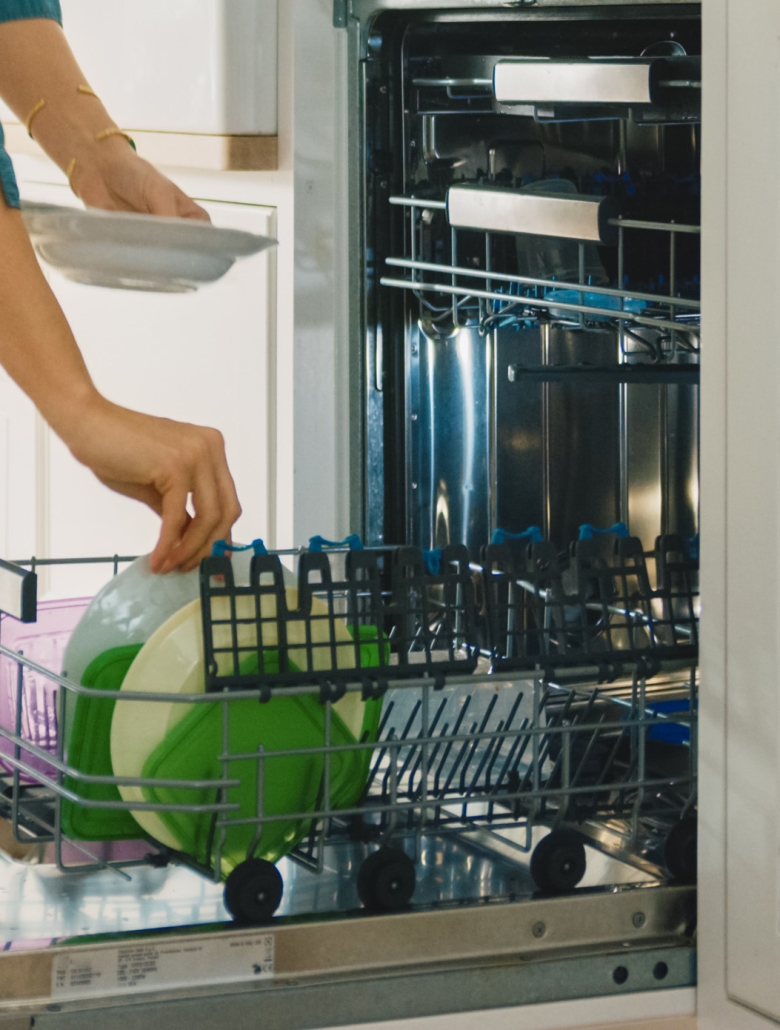
If using an appliance that requires running tap water – such as a dishwasher, water heater, or washing machine – use bottled or boiled water instead of tap water.
If you cannot boil water, you may be able to use an alternate method of disinfection, such as adding four drops of unscented bleach per liter (or quart) of cold tap water. Wait at least 30 minutes after adding the bleach before using any water.
If your plumbing is connected to a private well or another non-public source, contact your local health department for additional guidance on appropriate disinfection methods.
Be sure to check with your local health department or water supplier when the boil order has been lifted, and it is safe again to drink tap water without boiling it first.
Following these steps during a Boil Water Advisory may help ensure your water is safe to drink and use. However, if you have any health concerns related to the safety of your drinking water, contact your local health department or water supplier immediately for more information. You can also check your area for Water Advisory information at the OWASA website.
Remember: Boil all drinking and cooking water during a boil water advisory to keep yourself and your family safe!
https://www.poolesplumbing.com/wp-content/uploads/What-you-need-to-know-during-a-Boil-Water-Advisory-also.jpg13331500John Drenkhahnhttps://www.poolesplumbing.com/wp-content/uploads/PoolesPlumbing_Logo_FullColor_LightBG_RGB-1.svgJohn Drenkhahn2023-06-27 11:50:032023-06-27 11:50:05What you need to know during a Boil Water Advisory
The future of plumbing is an exciting prospect. With technological advances, we can now create more intelligent systems that detect problems before they arise and provide more efficient solutions. Smart home automation is also revolutionizing how homeowners interact with their plumbing, allowing them to monitor and control their water usage from any device remotely.
We’re also seeing a shift towards sustainable plumbing solutions like greywater recycling systems, which reduce waste and conserve resources by reusing wastewater for irrigation and other non-potable uses. Different eco-friendly strategies include:
Replacing traditional piping materials with safer alternatives like PVC or PEX pipes.
At the same time, plumbing technology is becoming more affordable than ever before. Innovative products like tankless water heaters and combination boilers are now readily available and can significantly save energy costs over time.
The future of plumbing
is looking brighter every day as new technologies continue to make this essential service more efficient and cost-effective for all households. From innovative home automation systems to eco-friendly solutions, the possibilities for transforming our homes into greener living spaces are seemingly endless. With continued advancements in plumbing technology, homeowners can look forward to a future full of convenience and savings.
In addition to these exciting developments, the plumbing industry is beginning to embrace new working methods. For example, many plumbers now offer virtual consultations using video conferencing platforms so that homeowners can get advice from the comfort and safety of their homes. This provides a convenient way for people to get the help they need without leaving the house. Many companies also invest in cloud-based storage systems that allow plumbers to access data quickly and accurately, streamlining customer service and improving overall efficiency.
Sustainable plumbing solutions are becoming increasingly important as we move into the future. From greywater recycling systems that reduce waste and conserve resources to energy-saving devices like solar hot water systems, there are numerous ways in which homeowners can make their plumbing more eco-friendly. Low-flow fixtures also help save water while replacing traditional piping materials with safer alternatives such as PVC or PEX pipes, providing further environmental protection. By embracing these sustainable solutions, we can save money in the long run and play an active role in preserving our planet’s precious resources. The future of plumbing is looking brighter and greener every day. Innovative new technologies are making it easier to create more intelligent, more efficient systems that reduce waste and conserve resources while also providing homeowners with the necessary convenience. Sustainable solutions like greywater recycling systems, low-flow fixtures, energy-saving devices such as solar hot water systems, and safer piping materials can all help make our homes greener living spaces in the years to come. By embracing these eco-friendly strategies now, we can save money and play an active role in preserving our planet’s precious resources for generations to come.
Overall, it’s an exciting time for plumbing professionals and homeowners looking to upgrade their systems. With state-of-the-art technology at our fingertips, we can now create more innovative, efficient systems that save money and resources in the long run. With continued innovation and advancements, the future of plumbing is looking very bright!
https://www.poolesplumbing.com/wp-content/uploads/Future-of-Pluming-Guy.jpg10241024John Drenkhahnhttps://www.poolesplumbing.com/wp-content/uploads/PoolesPlumbing_Logo_FullColor_LightBG_RGB-1.svgJohn Drenkhahn2023-06-24 12:33:352023-06-24 16:13:32The Future of Plumbing
Plumbing Facts, plumbing wis an essential part of any functioning home or business. Without it, you wouldn’t be able to do the many everyday things we take for granted, like flushing a toilet, shower, or washing dishes. Unfortunately, there are some plumbing truths that only some know about, and they can cause problems if neglected. Here are some hard-hitting facts about plumbing that all homeowners should know:
Top Plumbing Facts
Clogs happen – You may have heard that flushing certain items down the toilet will cause clogs in your pipes. This is true! Other than human waste (toilet paper) and water, nothing else shouldn’t be flushed as it can cause severe blockages that require professional help.
Regular maintenance is critical – Have your plumbing system in your homes or offices inspected and adequately serviced by a professional every few years to ensure it functions optimally. This could save you from costly repairs and replacements down the line!
Pipe problems can be hidden – Many homeowners don’t realize it, but pipe damage and leaks can occur without visible signs or symptoms. Leaks can appear behind walls or in other hard-to-reach areas, so regular inspection is essential to catch them before they become serious problems.
Pipes freeze in cold weather – It’s essential to understand that pipes can freeze if temperatures drop too low for an extended period. Ensure your pipes are appropriately insulated and exposed to minimal cold air to prevent this.
Be careful with DIY plumbing – Attempting to make repairs or installations on your own may be dangerous and could lead to injury and even illegal, depending on where you live. Unless you have the necessary expertise, it’s best to leave these tasks to a professional plumber who can do them safely and efficiently.
By understanding these common plumbing truths, you can maintain your home’s plumbing system better and avoid costly problems down the road! However, if there are any questions, please get in touch with Raleigh’s number-one trusted plumber, www.poolesplumbing.com.
Fun Plumbing Facts: Did you know that around 90%of toilet clogs can be fixed by simply using your plunger? Did you know the average American can use 150 gallons of water daily? Did you know your dishwasher uses around 10 gallons of hot water daily? Did you know that we waste 4 gallons of water every time we leave the water running when brushing our teeth? Did you know the number of leaks in a home can fill up a swimming pool? Each leak can produce up to 10,0000 gallons of water per year.
Do you know who invented the first flush toilet? It was Sir. John Harrington made two, one for himself and one for his godmother Queen Elizabeth.
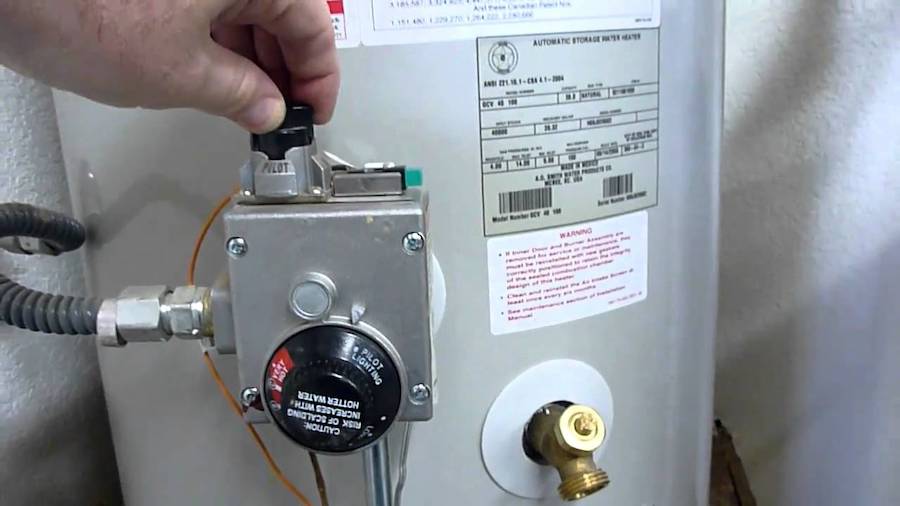
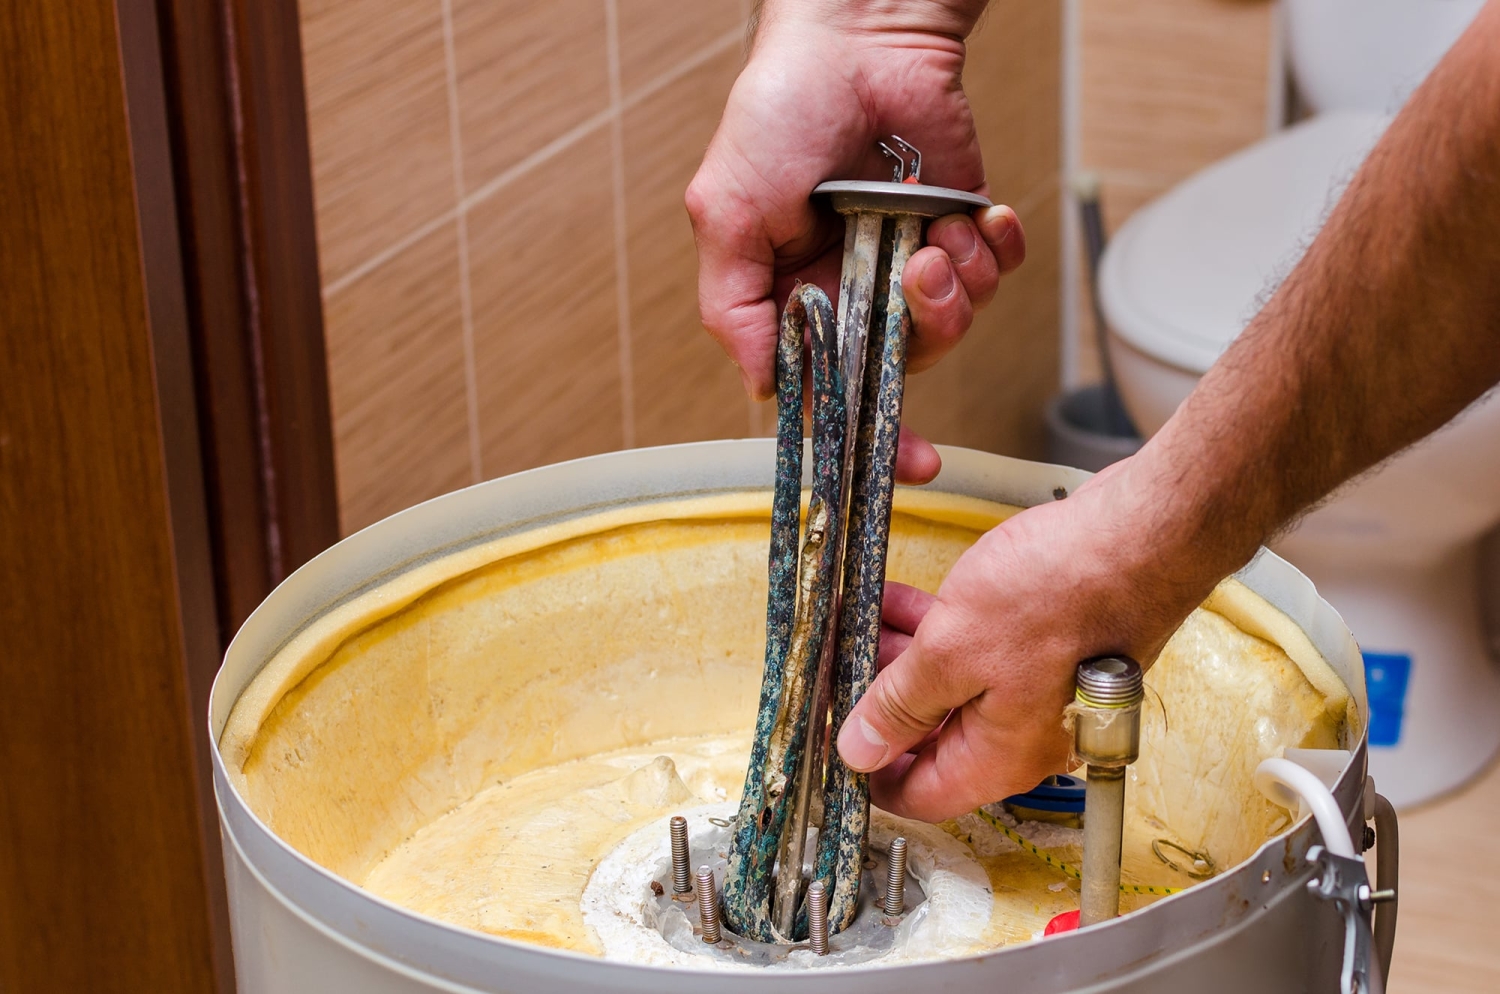
Tankless Water Heaters in Older Homes — Excellent Tankless water heaters, also known as on-demand water heaters, can be an energy-efficient upgrade for a home. However, installing a tankless water heater in an older home can present some unique challenges. Older homes may have smaller diameter water supply lines that cannot accommodate the higher flow rates of tankless heaters. They may also have electrical systems that cannot handle the power needs of the heater. However, with some planning and problem-solving, installing a tankless water heater in an older home is often possible.
Installing a tankless water heater in an older home can be tricky. However, not only do you need to make sure that the existing plumbing and electrical systems are up to code, but you also have to consider the age of the house itself. Older homes typically have smaller diameter water supply lines, which may need help to handle the higher flow rates of modern tankless heaters. In addition, electric tankless heaters require more power than most older electrical systems can provide. However, with proper planning and problem-solving, installing a new modern tankless water heater in an older home is still possible.
You can upgrade to an efficient tankless water heater even in an older home with some adjustments and the right tankless model choice. Doing your homework upfront will help ensure you choose the best option for your home’s needs and can address any challenges during installation. Installing a new modern tankless water heater in an older home can significantly upgrade energy efficiency and save money on utility bills. However, it’s essential to consider the age of the house and its existing plumbing and electrical systems before making any decisions. Older homes typically have smaller diameter water supply lines, which may need help to handle the higher flow rates of modern tankless heaters. In addition, electric tankless heaters require more power than most older electrical systems can provide. However, with some adjustments and careful planning, you can still install a new modern tankless water heater in an older home.
Here are some steps to take when working with Tankless Water Heaters in older homes:
Check the size of your home’s water supply lines and electrical system. Tankless water heaters typically require a minimum of 3/4-inch water supply lines and a 200-amp electrical service. If your lines or service panel do not meet these requirements, you must upgrade before installing the tankless heater.
Consider a lower flow model. If upgrading your plumbing or electrical system is not feasible, choose a tankless model with a lower flow rate requirement. These typically produce hot water more slowly but can function with smaller supply lines and less power.
Install a circulation pump. If you have long plumbing runs with many fixtures, a circulation pump can help ensure hot water is delivered quickly to all outlets. The pump keeps water moving, so it produces hot water.
Add insulation and heat traps. Insulating your water supply lines and installing heat traps or hot water recirculation valves on fixtures can also help improve the performance of a tankless water heater in an older home. Reducing heat loss means the water heater does not have to work as hard to keep water hot.
Considering these steps when upgrading to a modern tankless water heater in an older home, you’ll surely increase energy efficiency while saving money on utility bills. For additional questions regarding tankless water heaters, contact us at www.poolesplumbing.com
https://www.poolesplumbing.com/wp-content/uploads/tankless-water-heater.jpeg13252000John Drenkhahnhttps://www.poolesplumbing.com/wp-content/uploads/PoolesPlumbing_Logo_FullColor_LightBG_RGB-1.svgJohn Drenkhahn2023-05-29 17:16:292023-05-29 17:16:31Tankless Water Heaters in Older Homes
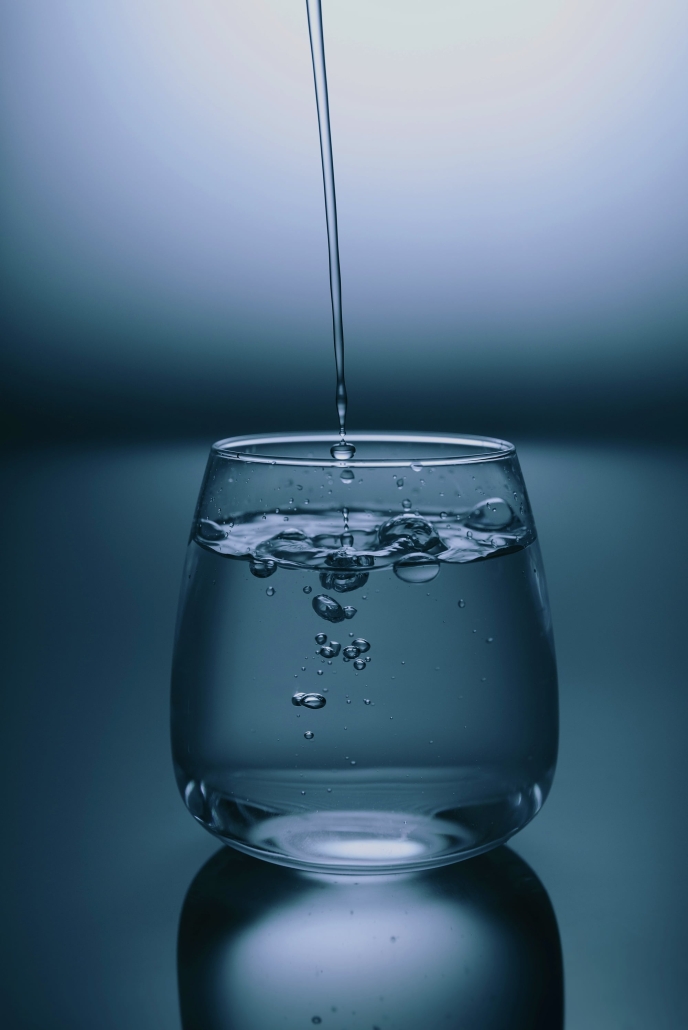
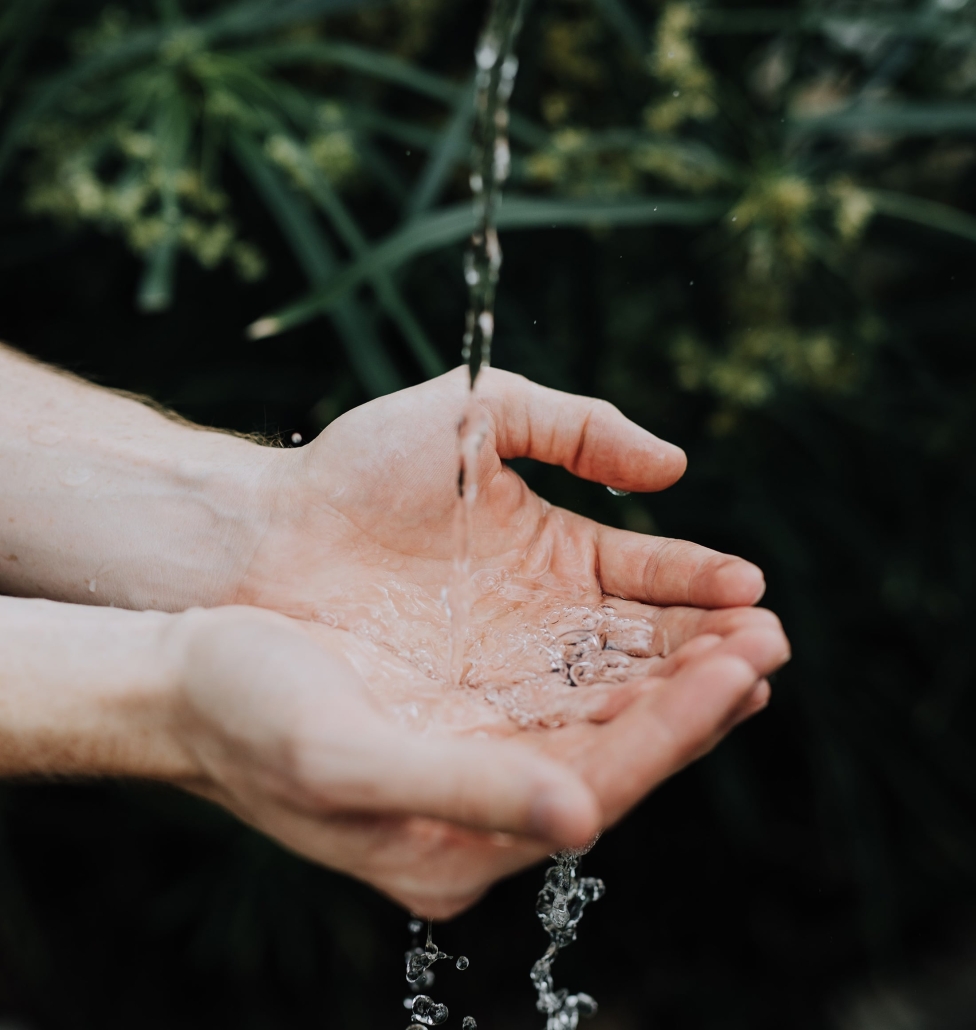
The benefits of Ionized water have become increasingly popular as a healthier alternative to regular tap water. It is created through ionization, which uses an electric current to separate water into two components: ionized alkaline and ionized acidic. The result is an incredibly pure and clean form of water that can provide numerous health benefits.
First, the pH level in Ionized Water is higher than in regular drinking water, making it more alkaline. This means that when you drink it, your body will have a much easier time absorbing nutrients due to the increased alkalinity. Additionally, because the pH level is so high, bacteria often cannot survive in this type of water for long periods. As a result, it is much cleaner and safer than regular water.
Ionized water also has antioxidant properties that may protect our body from free radicals that can cause oxidative stress. These free radicals are found in our environment and can lead to various health problems, such as cancer and heart disease, so an effective way to combat them is essential. When you drink ionized water, these antioxidants will neutralize the free radicals, reducing their harmful effects.
Finally, Ionized Water also helps improve digestion by breaking down food particles more thoroughly than regular tap water. This increased breakdown of food makes it easier for those nutrients to be absorbed into your bloodstream and used for energy or other bodily functions. Because of this improved digestion, many people have reported feeling more energized and alert after drinking ionized water.
Overall, Ionized Water is a great way to improve your health and well-being by providing your body with essential minerals and antioxidants that regular tap water cannot offer. You can find ionized water in stores or online for an affordable price, making it a great alternative to normal drinking water if you want something healthier. So consider switching to ionized water today.
Water ionizers are one of the most popular and effective ways to enjoy the benefits of Ionized Water. These machines use electrolysis to separate regular water into alkaline and acidic components. The alkaline part is then passed through a series of filters, including activated charcoal and mineral-rich stones, which help remove impurities!
Water ionizers are among the most advanced and efficient devices for creating ionized water. These machines use electrolysis to break down regular tap water into ionized alkaline and acidic components, completing an incredibly pure form of drinking water. These machines employ filters to remove impurities, including activated charcoal and mineral-rich stones.
Water ionizers are a great way to get healthier, cleaner water. They use electrolysis to separate alkaline and acidic ions in the water, creating two types of water – one with higher pH levels for drinking and cooking and one with lower pH levels suitable for cleaning. This process can help reduce contaminants like lead, copper, mercury, and chlorine from your water.
So, the best water ionizers on the market today offer a variety of features to help you get the cleanest, healthiest water possible. Look for models with an adjustable pH range, so you can customize the alkalinity or acidity of your water as needed. Additionally, many top-of-the-line water ionizers come with filters and other components to reduce contaminants.
When shopping for a water ionizer, looking at the price tag and the offered features is essential. Models with larger capacities are more expensive but may provide better filtration performance. Pay attention to the warranty and customer service policies, too. Quality manufacturers will offer long-term warranties and responsive customer support if you experience any problems with your water ionizer.
Benefits of Ionized Water
Finally, consider where the unit will be installed. If you plan to install it in an area without access to a faucet or other water source, look for a model with an internal reservoir. This will make refilling much easier and more convenient.
Overall, water ionizers are an excellent way to improve the quality of your drinking water while reducing contaminants and impurities. With some research and comparison shopping, you can find the perfect model for your needs.
https://www.poolesplumbing.com/wp-content/uploads/Benefits-of-Ionized-Water.jpg13122200John Drenkhahnhttps://www.poolesplumbing.com/wp-content/uploads/PoolesPlumbing_Logo_FullColor_LightBG_RGB-1.svgJohn Drenkhahn2023-05-13 19:58:162023-05-13 19:58:18Benefits of Ionized Water
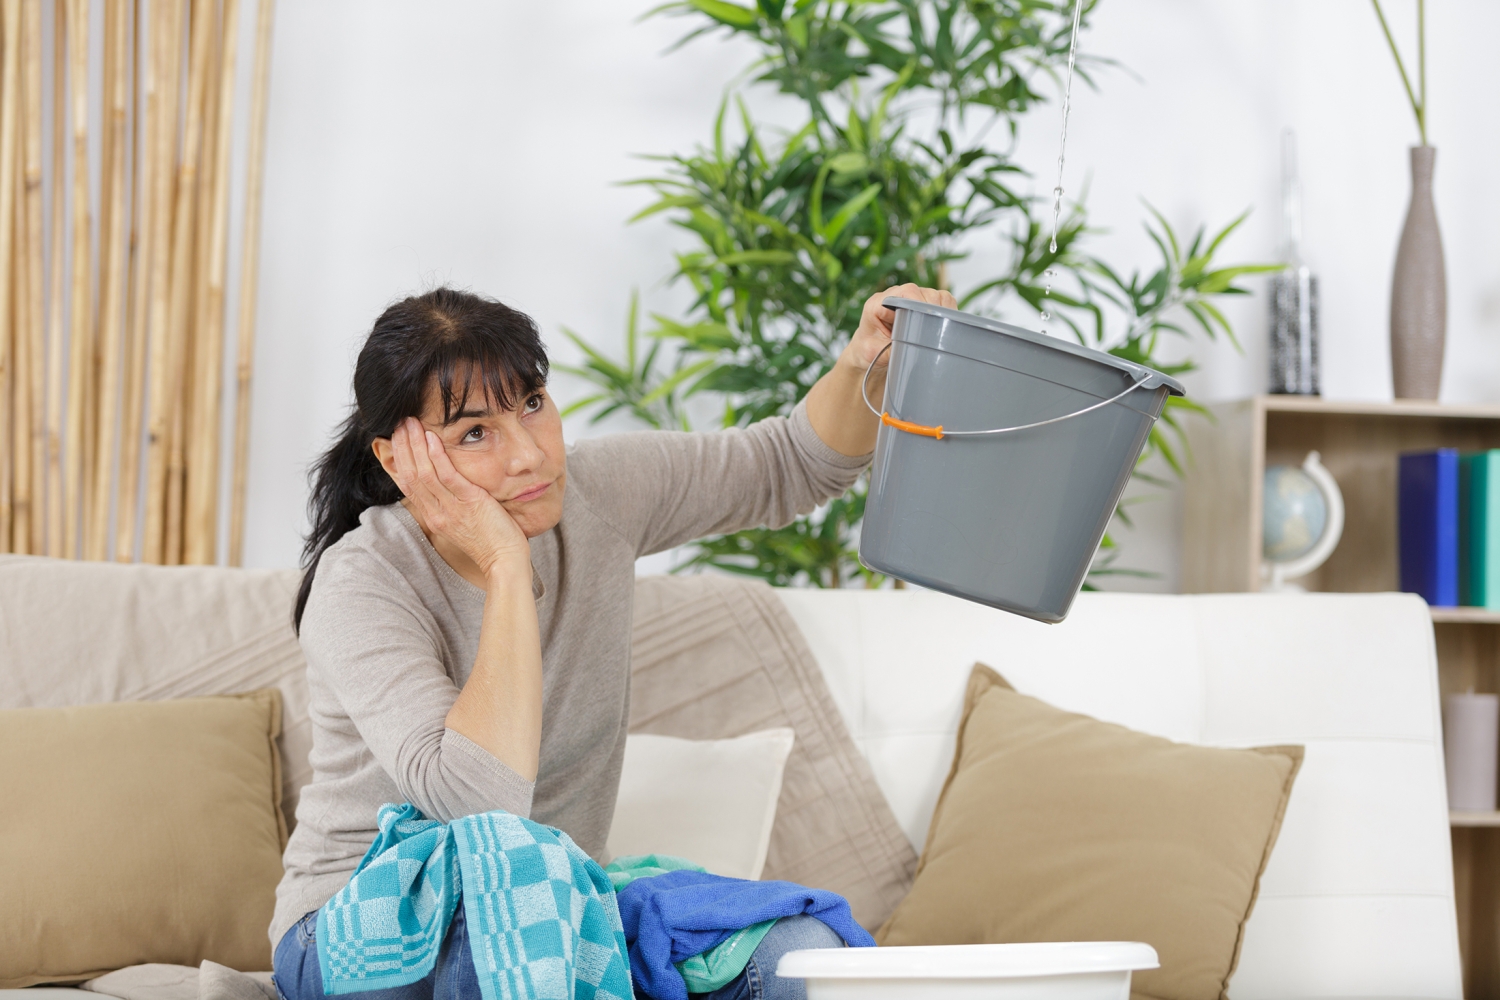
We know the old saying, “April showers may bring May flowers,” but they can also have a less-than-welcomed effect on our plumbing. Water leaks caused by April rain can cause costly damage to our homes, so taking the proper precautions is essential.
Rain can cause major plumbing issues in your home, especially when it comes to water leaks. Heavy rain combined with aging pipes, blocked drains, or a poorly designed system can create excess pressure on your home’s plumbing system. This can lead to water leakage from pipes, fittings, and valves.
If left unchecked, this plumbing issue can cause considerable damage to walls, ceilings, and other parts of the home. That’s why it’s essential to identify potential issues before they become serious problems and contact a professional plumber when you suspect there might be a leak in your plumbing system.
One of the most common culprits of such leaky plumbing is overflowing gutters and downspouts. When the drains become clogged with debris, water can’t flow properly and will build up in your roofing system instead. That excess water can seep into your walls or other home areas, leading to potentially costly damages.
Another possibility is that April showers overload our plumbing systems and cause them to burst or leak. This can happen due to age (older pipes have a higher risk of bursting) or increased water pressure.
Plumbing Issues
To avoid these plumbing woes, it’s essential to take some preventative measures during April showers:
Clear your gutters and downspouts regularly to ensure proper water flow away from your house.
Ensure you have the correct grade pipes; copper and other metals are recommended over plastic, as they are less likely to burst or leak due to pressure.
Install a backflow valve that can prevent water from entering your home if there should be an overflow of water in the system.
By taking the proper preventative measures and being aware of the risks, you can avoid a rainy-day disaster in your home.
https://www.poolesplumbing.com/wp-content/uploads/Plumbing-Issues.jpeg9001200John Drenkhahnhttps://www.poolesplumbing.com/wp-content/uploads/PoolesPlumbing_Logo_FullColor_LightBG_RGB-1.svgJohn Drenkhahn2023-04-21 04:18:002023-04-19 16:21:19Plumbing Issues, Don’t let April Showers Spoil Your Day!
They can be smelly, unsanitary, and inconvenient. Fortunately, many simple solutions are available that don’t have to be difficult, messy, or expensive. Natural drain cleaners such as baking soda and vinegar are effective at breaking up grease and soap buildup in your pipes. For more challenging blockages like hair or food particles, you may need to use more powerful chemical products like liquid plumbers or enzymatic cleaners. If all else fails, there is always the option of hiring a professional plumber who will come in with specialized tools to clear out any stubborn clogs for good! No matter what solution you choose for your clogged drains, it doesn’t have to be an overwhelming task anymore.
Drain cleaning and unclogging solutions don’t have to be difficult, messy, or expensive. The key is knowing how a drain works, what causes clogs and blockages, and how to tackle the job safely.
If you’re dealing with minor blockages caused by soap scum, hair, grease from cooking fat, coffee grounds, foreign objects accidentally flushed down the toilet, or small amounts of food buildup in kitchen sinks, then a good-quality plunger will usually do the trick. Use a flange plunger for bathrooms, creating a better seal around the drain’s opening. To get maximum plunging power, it’s best to fill the bowl or sink with enough water to cover the plunger cup and then use a steady, firm pressure. Another option is using a drain snake or auger. This tool has a long flexible cable that can be fed into the pipe to break up blockages and push them through the system.
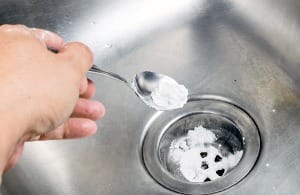
A tablespoon of baking soda followed by a half cup of vinegar is one unclogging solution.
If these solutions don’t work, it’s time to look into more extreme measures such as chemical cleaners or professional drain cleaning services. Chemical cleaners should only be used as a last resort as they can contain harmful chemicals which could damage your pipes. Professional drain cleaning services usually involve high-pressure water jetting or cabling machines designed to cut through roots, grease, and other debris that might have been blocking your pipes.
Finally, preventative maintenance is the best way to avoid problems with blocked drains. Making sure that you dispose of food waste properly and using a mesh drain guard will help prevent clogs from occurring in the first place. Also, having a plumbing service maintenance contract may be beneficial.
By understanding the basics of how your drains work, assessing what’s causing any blockages, and taking the necessary steps to tackle the problem safely, you can be confident that you’ll be able to unclog your pipes quickly. With some patience and elbow grease, tackling a blocked drain doesn’t have to be such a daunting task! If issues still arise, contact Raleigh’s most trusted professional plumber at poolesplumbing.com.
https://www.poolesplumbing.com/wp-content/uploads/clogged-drain.jpeg14572200John Drenkhahnhttps://www.poolesplumbing.com/wp-content/uploads/PoolesPlumbing_Logo_FullColor_LightBG_RGB-1.svgJohn Drenkhahn2023-04-13 13:54:512023-04-13 13:54:52Clogged Drain? Learn the Basics of Drain Cleaning.
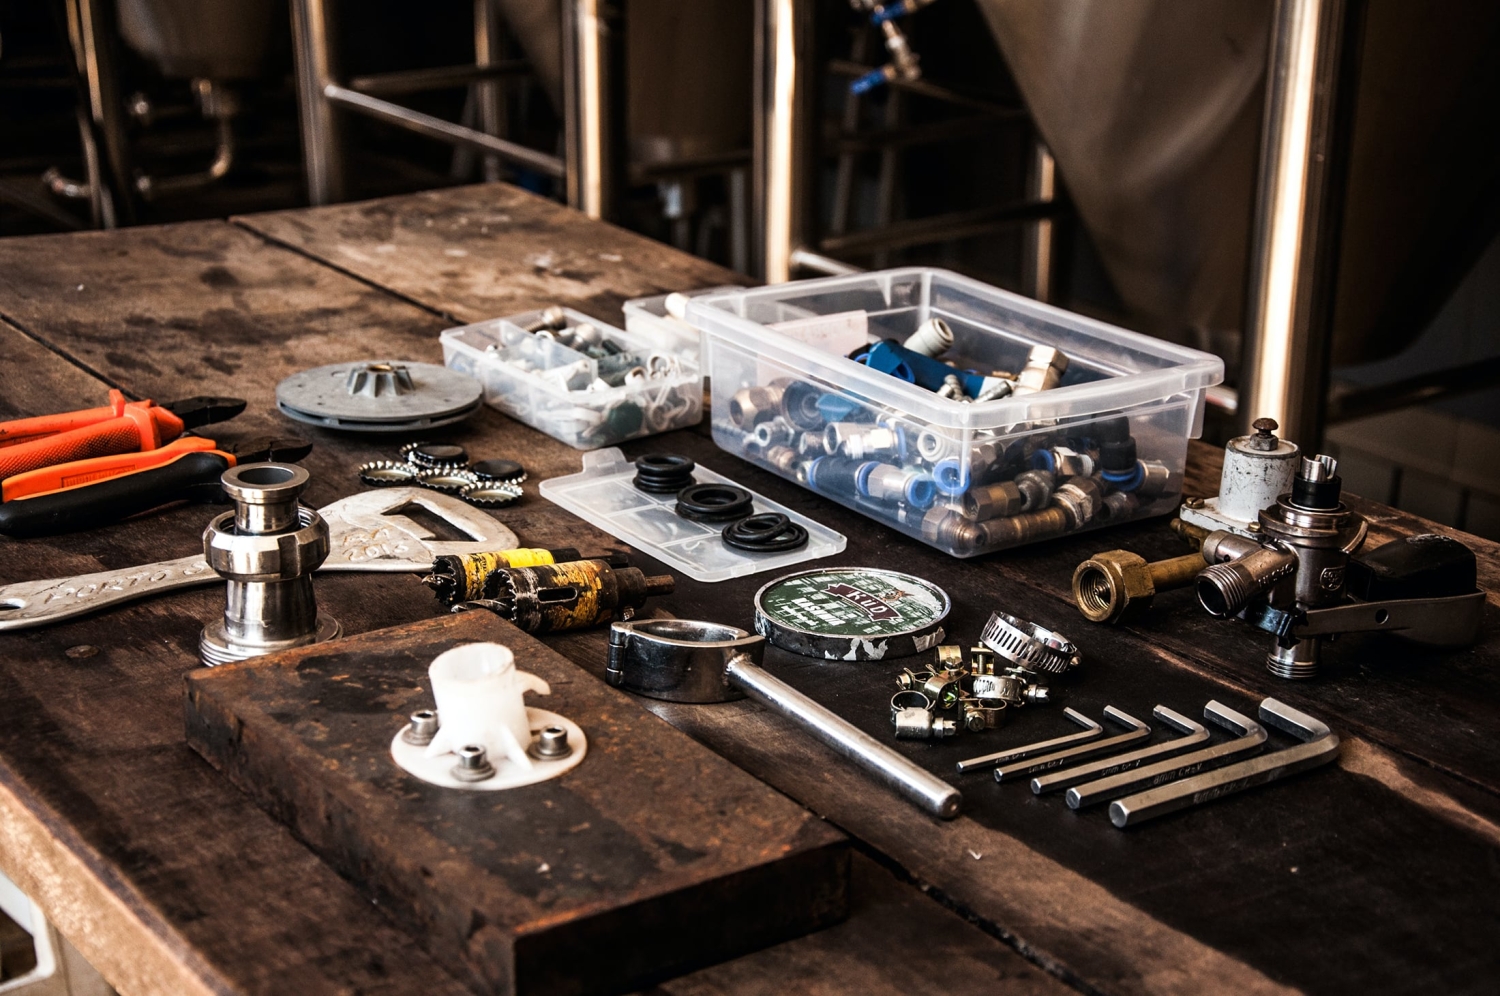
Common Mistakes to Avoid when Installing Plumbing Fixtures — When installing new plumbing fixtures in a home or business, it’s easy to get carried away and overlook the finer details when installing new plumbing fixtures in your home. Plumbing is a complex system, and even tiny mistakes can mean big problems down the line. You should avoid a few simple mistakes when installing new plumbing fixtures to save time, money, and stress.
When installing new plumbing fixtures in your home, several common mistakes should be avoided to ensure the job is done correctly.
First, checking that all necessary tools and materials are available before starting any installation process is essential. This includes pipe wrenches, screwdrivers, Teflon tape, pipe cutters, and other specialty tools, depending on the type of fixture installed. Taking a few moments to ensure everything you need is ready can save you time in the long run.
Second, ensure all existing water lines are shut off before beginning installation. This ensures you don’t have gallons of water spilling out when making connections or adjustments.
Also, turn off any existing water supply lines before you start working on the fixture. This may seem obvious, but it’s easy to forget in the heat of the moment and can result in a big mess!
Some fixtures also require electricity for proper installation – if this is the case, ensure you are familiar with electrical wiring or hire a qualified electrician to do the job safely and correctly.
If electricity is required for the fixture, hiring a qualified electrician to do any necessary wiring or installations safely and correctly is essential.
Third, install new plumbing fixtures and double-check all connections before turning on the water supply. Even small leaks or weak connections can cause significant problems down the line, so it pays to be thorough when installing fixtures. Ensure all pipes are securely connected and no loose parts remain before testing the new institution.
Finally, even if something doesn’t seem quite right during the installation process, don’t hesitate to start over from scratch if necessary – better safe than sorry! If a mistake is made during installation, it could mean more costly repairs down the road, so take care not to rush through it or cut corners to complete the job quickly.
By avoiding these common mistakes when installing new plumbing fixtures, you can ensure your project is successful and hassle-free! With just a little knowledge and preparation, you can ensure that your installation goes smoothly and with minimal stress. Don’t let plumbing woes get in the way of home improvement – plan and be prepared for any potential issues before they arise!
Benefits of a professional service contract. A professional plumbing service contract can benefit your home or business. Not only will you have access to trained experts and the latest cutting-edge equipment, but you’ll also be able to rest easy knowing that your system is in good hands.
It also helps ensure that your plumbing systems are running efficiently and up to code, ensuring your safety. Lastly, having reliable coverage through a service contract means that you don’t have to worry about making on-the-spot decisions when it comes to plumbing disasters – your trusted plumbing provider is always just a phone call away for any issue or concern.
Here are some of the advantages of signing up for a plumbing service contract.
Benefits of A Professional Service Contract
Lower Repair Costs: A plumbing service contract can save you money in the long run by helping to prevent costly repairs from developing over time. By signing up for regular maintenance visits, any minor problems can be caught early on and fixed before they become more significant. Additionally, if there is ever an emergency with your plumbing system, having a service contract could help keep repair costs down.
Improved Efficiency:Plumbing systems that are adequately maintained will work more efficiently and last longer. A professional plumbing contractor can help ensure your system is regularly inspected, tested, and serviced, so it runs at peak efficiency for many years.
Increased Safety: Poor plumbing maintenance can lead to serious health hazards and property damage from flooding or water leaks. With a service contract, you can rest assured that any issues related to your plumbing system are handled promptly and professionally by experts who know what they’re doing.
Professional plumbing services can be the difference between a minor inconvenience and a major headache. From routine maintenance to emergency repairs, qualified and experienced professionals are equipped to handle any plumbing situation efficiently and promptly. A skilled plumber can also diagnose potential problems before they become costly disasters, preventing expensive damages in time and money. Professional plumbers have access to the latest technology, tools, and materials, allowing them to tackle even the most challenging jobs. Their expertise also allows them to install or modify new systems quickly with minimal disruption. Overall, there is no substitute for professional knowledge and skill in plumbing services.
www.poolesplumbing.com
https://www.poolesplumbing.com/wp-content/uploads/Benefits-of-A-Professional-Service-Contract.jpeg13292200John Drenkhahnhttps://www.poolesplumbing.com/wp-content/uploads/PoolesPlumbing_Logo_FullColor_LightBG_RGB-1.svgJohn Drenkhahn2023-03-22 07:46:002023-03-19 17:47:26Benefits of A Professional Service Contract
Preventing Plumbing Damage, the spring thaw is a time of dread for many homeowners, as it can mean plumbing nightmares. Exposed pipes may freeze, burst, and cause expensive water damage in the home. However, a few easy steps can prevent your plumbing from becoming an outdoor swimming pool this spring.
As the weather warms up and snow melts, it’s essential to maintain a healthy sewer system this spring. Spring thaw can cause flooding and other water-related damage if not properly managed, so homeowners and those responsible for keeping sewers must be aware of the risks and take proactive measures. Here are some tips on preparing your property for the spring thaw by conserving water and preventing potential damage.
First off: wrap up those exposed pipes! Insulation is your best friend when it comes to keeping lines from freezing. Even if you think the pipes are in an area that won’t freeze, it’s better to be safe than sorry. Just wrap them up with foam insulation, and you’ll be ready.
Next up: Know where to shut off your main water valve in an emergency. Please find out how to turn it off if a pipe bursts and you need to quickly stop the water flow, or make sure a professional show you how to locate and operate it.
Finally, if the pipe bursts or leaks, don’t panic! Go to your main valve, shut the water off, and immediately seek professional help. Trying to fix it yourself could lead to more damage and costlier repairs.
Preventing Plumbing Damage
Maintain your gutters: Taking care of your home’s gutters should always be at the top of any homeowner’s list for preventing water-related damage during the spring thaw. Cleaning out your gutter system regularly helps avoid ice damming – which can lead to flooding and basement moisture issues – and minimizes soil erosion and foundational damage risk.
Inspect drains and downspouts: Make sure all of your home’s outdoor gutters and downspouts are in good condition, as well as any drainage systems on your property. Go ahead and check for any clogs or blockages that could slow the flow of water when the snow melts, leading to flooding or pooling around the foundation.
Monitor spring showers: Spring showers can be unpredictable, so paying attention to weather forecasts and anticipating large storms that may cause flooding is essential. If needed, install sandbags or temporary barriers around vulnerable areas of your property to prevent water from entering buildings or damaging landscaping.
Install a sump pump: To protect your home from potential flooding further, consider installing a sump pump to ensure that water is quickly and efficiently redirected away from your property. This can help minimize any damage caused by heavy spring rains or snowmelt.
Preparing your property for the spring thaw can help conserve water and protect your family and home from costly repairs. With these tips in mind, you’ll be better equipped to handle whatever Mother Nature throws you this spring!
Take time to protect your home – be prepared now and rest easy all season long.
https://www.poolesplumbing.com/wp-content/uploads/Preventing-Plumbing-Damage.jpeg14672200John Drenkhahnhttps://www.poolesplumbing.com/wp-content/uploads/PoolesPlumbing_Logo_FullColor_LightBG_RGB-1.svgJohn Drenkhahn2023-03-19 12:59:142023-03-19 12:59:15Preventing Plumbing Damage — Spring Thaw tips for Saving Water and Preventing Damage
Eco-friendly Plumbing Solutions Going green with eco-friendly plumbing solutions is a great way to demonstrate your commitment to reducing your environmental footprint and creating a healthier, safer environment for yourself, your family, and the planet. Eco-friendly plumbing solutions provide many benefits, including reduced water consumption, improved air quality, and fewer pollutants entering our waterways.
With new developments in technology and materials, it’s easier than ever to find plumbing solutions that are more environmentally friendly.
Water conservation
Water conservation is essential for a sustainable future, and plumbing plays a vital role. Plumbing systems can be designed, installed, and maintained to conserve water in our homes, businesses, and institutions. We can reduce our water consumption without sacrificing comfort or convenience by implementing the proper measures.
From low-flow fixtures to rainwater harvesting systems, there are many ways that plumbing professionals can help us save precious resources. Low-flow toilets use just 1 gallon per flush instead of the traditional 5 gallons, while low-flow shower heads reduce water usage by up to 60%. Rainwater harvesting systems collect runoff from roofs and other surfaces for reuse in gardening or laundry applications. Other techniques like grey water recycling involve diverting wastewater from sinks and showers back into toilet tanks, significantly reducing water waste.
Eco-friendly and sustainable living encompasses practices that strive to help reduce the environmental impact of everyday activities in our society.
This includes reducing waste and conserving resources and your household. Low-flow faucets are one of the most common eco-friendly plumbing solutions available today. They help reduce water waste by limiting water use when filling containers or washing dishes. Tankless water heaters are also becoming increasingly popular, as they only heat water when needed, which helps reduce energy costs and eliminates standby energy losses associated with traditional storage tank systems. Other natural insulation products, such as recycled cotton fiber materials, can be installed in existing pipes to separate hot and cold air without harmful chemicals. In contrast, chemical-free cleaners made from natural ingredients such as baking soda and vinegar can clean drains without introducing additional pollutants into the environment.
When selecting eco-friendly plumbing solutions for your home, it’s essential to research the various options available and determine which ones are best suited to meet your needs. For example, high-efficiency toilets are designed with special high-efficiency flush valves that use less water than regular models; this is great for reducing utility costs and water waste. In addition, showerheads with adjustable settings allow you to adjust the amount of water used each time you take a shower, which helps conserve water without sacrificing comfort or convenience.
Finally, when considering eco-friendly plumbing solutions, it’s essential to look for those certified by organizations like WaterSense or Energy Star. These certifications indicate that the product has been tested and verified to meet specific environmental standards to ensure its sustainability and longevity. Investing in these certified products can help ensure that your home’s plumbing system remains safe and efficient while also helping protect the environment around it. Eco-friendly plumbing solutions provide an excellent opportunity to reduce your utility bill while making your home more sustainable — something everyone should be proud of!